 Photo: Marina Shemesh
 To help with building your year's supply (this is Week 12 of 26), see this chart.
What is powdered milk?.
Why store it?.
How much powdered milk is recommended? And how do I store it?.
How do I use powdered milk?.
What if it gets old?.
What dairy-free substitutes can I store?.
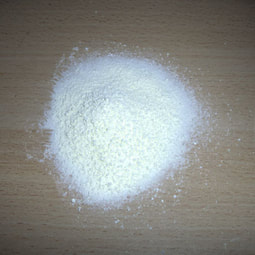
What is powdered milk?
Milk begins with a very high water content—about 82%. The water is removed in a couple of steps- a low-temperature evaporative boil is first. Doing this in a vacuum allows the boiling to happen at 135° F rather than the regular 212°. Then it’s sprayed from a very tall tower into very hot, swirling air. A tiny particle of powdered milk is all that’s left when it hits the bottom. (See this article for super-interesting details.) This milk powder is made of very small, nearly dust-sized specks.
Since fat turns rancid quickly and drastically shortens shelf life, powdered milk for long-term storage is fat-free. It’s skim milk that goes through the drying process. That’s also why it tastes watery. Adding a little extra powder when mixing up the milk will help with this. And adding a bit of vanilla helps give it some flavor. Serving it chilled helps, too.
Full-fat powdered milk is available if you know where to look. The only brand I’ve seen widely available is Nido. It’s a whole milk powdered milk you can find sometimes in the Hispanic foods section at grocery stores. In the U.S. it’s mostly used in the food industry, but tons of it per year are shipped to third-world countries, where they have few dairies, little way to transport the milk, and no refrigerators to store it in anyway. If you buy whole-milk powder, use it within 6 to 9 months unless it’s in sealed cans and stored under 75°F. And then use it up within, say, five to seven years.
I have some that’s older than that; I can report later this week on what it’s like, if I remember…
Instant powdered milk is made by making the tiny particles clump together to make a little bigger granules. There’s air between the particles, which allows water to better penetrate when you're reconstituting it. The air also makes the powder less dense. That’s why you’ll sometimes see recipes that specify which kind to use- ‘non-instant powdered milk’ or ‘instant powdered milk’. It takes a larger scoop of instant powdered milk to be equal to a smaller scoop of the regular. (Of course, you can go by weight measurement and get it right every time!)
One pound of either instant or regular nonfat milk powder will make about one gallon of milk.
What is powdered milk?.
Why store it?.
How much powdered milk is recommended? And how do I store it?.
How do I use powdered milk?.
What if it gets old?.
What dairy-free substitutes can I store?.
What is powdered milk?
Milk begins with a very high water content—about 82%. The water is removed in a couple of steps- a low-temperature evaporative boil is first. Doing this in a vacuum allows the boiling to happen at 135° F rather than the regular 212°. Then it’s sprayed from a very tall tower into very hot, swirling air. A tiny particle of powdered milk is all that’s left when it hits the bottom. (See this article for super-interesting details.) This milk powder is made of very small, nearly dust-sized specks.
Since fat turns rancid quickly and drastically shortens shelf life, powdered milk for long-term storage is fat-free. It’s skim milk that goes through the drying process. That’s also why it tastes watery. Adding a little extra powder when mixing up the milk will help with this. And adding a bit of vanilla helps give it some flavor. Serving it chilled helps, too.
Full-fat powdered milk is available if you know where to look. The only brand I’ve seen widely available is Nido. It’s a whole milk powdered milk you can find sometimes in the Hispanic foods section at grocery stores. In the U.S. it’s mostly used in the food industry, but tons of it per year are shipped to third-world countries, where they have few dairies, little way to transport the milk, and no refrigerators to store it in anyway. If you buy whole-milk powder, use it within 6 to 9 months unless it’s in sealed cans and stored under 75°F. And then use it up within, say, five to seven years.
I have some that’s older than that; I can report later this week on what it’s like, if I remember…
Instant powdered milk is made by making the tiny particles clump together to make a little bigger granules. There’s air between the particles, which allows water to better penetrate when you're reconstituting it. The air also makes the powder less dense. That’s why you’ll sometimes see recipes that specify which kind to use- ‘non-instant powdered milk’ or ‘instant powdered milk’. It takes a larger scoop of instant powdered milk to be equal to a smaller scoop of the regular. (Of course, you can go by weight measurement and get it right every time!)
One pound of either instant or regular nonfat milk powder will make about one gallon of milk.
Why store it?
There are at least four big reasons-
1-To have the minerals and other nutrition milk provides.
2-To have more options in your cooking. Many recipes use milk and products made from milk. Did you know that you can, in your very own kitchen, turn powdered milk into yogurt, cottage cheese, a mozzarella-type cheese, a cream cheese substitute, and much more?
3-No refrigeration is required, unlike fresh milk, which sours quickly at room temperature. This is helpful in emergency situations.
4-For its long shelf life. Fresh milk lasts less than a month in the fridge; canned evaporated milk is best within a couple of years; but nonfat milk powder, sealed along with oxygen absorbing packets, can last for a good 20 years when kept under 75° F.
How much powdered milk is recommended? And how do I store it?
Did you notice that in the list of why to store powdered milk, I didn’t say “so you can enjoy milk three times a day”? That’s because you couldn’t, if you were storing the recommended amount. While you would likely use some for drinking, that’s not its primary purpose. I don’t know about you, but I’d be making most of mine into cheese for recipes!
The recommended storage amount is 16 pounds per person. You’d need to store almost 70 pounds per person to be able to have the equivalent of three glasses of milk per day.
I like variety in my storage, so I include evaporated milk and sweetened condensed milk—although you can make those with powdered milk, too. 5 cans of evaporated milk is equal to about one pound of milk powder, while it takes 8 cans of sweetened condensed milk to replace one pound of dry milk powder.
Keep long-term storage products at or below 75°F/24°C whenever possible. If storage temperatures are higher, rotate (eat!) the food more often.
How do I use powdered milk?
Go to http://everydayfoodstorage.net/training-cooking/powdered-milk for recipes for evaporated milk, Magic Mix, and Condensed Soups using Magic Mix. She has a great little chart you can print out and tape to the inside of your cupboard so you know how much milk powder to use when you're baking with it:
The Wooden Spoon class handout has a TON of recipes info on powdered milk. It's from some classes that the Church of Jesus Christ’s ‘Welfare Square’ was teaching for a little while. The collection is not copyrighted; the two ladies who compiled it just wanted to spread the information.
When I get a bunch of new recipes, usually most of them get ignored unless I'm already familiar with them. So skim through the recipe booklet and look through my notes on the recipes.
For the recipes that give you whey (this means any of the cheeses, including the yogurt cream cheese), save the whey. It has vitamins, minerals, some protein, no fat, and some milk sugar (lactose- very low on the glycemic scale). I use it in pancakes, muffins, bread, etc. If your whey has vinegar in it (most of the cheeses in there do), you can add 1 tsp. baking soda for every 2-3 cups of whey. This will neutralize most of the vinegar. Yes, it will foam up, kind of like those volcanoes you made in 3rd grade…
What if it gets old?
The answer to that has a lot to do with “How do I use it?” If it’s not old, don’t let it all get there.
If it’s already old, it may still be fine. Recent food-storage testing at the BYU Foods lab showed that 20 years can be expected on sealed powdered milk stored under 75°F. Here’s the chart of their findings for milk and other year-supply foods.
If you’ve opened a can and it smells bad, don’t throw it in the trash. It’s good as garden fertilizer! Tomatoes especially need calcium, in order to avoid blossom-end rot. And milk can help prevent the dreaded powdery mildew on plants, as well as to control aphids. Here is an article on 8 ways to use milk in the garden.
What dairy-free substitutes can I store?There are several. There’s powdered goat milk, powdered soy milk, powdered coconut milk. If you’re good at rotating what you store, canned milks are options- canned coconut milk is the cheapest option. Just know it doesn’t contain much calcium. Keep calcium supplements on hand, store lots of white beans in your 60 pounds of legumes, store blackstrap molasses, and/or plan on growing lots of dark green leafy vegetables.
You can make milk-like liquids for drinking or cooking, using rice, almonds, cashews, or oats as the base. Again, these won’t contain much calcium, so you’ll need to account for that.
What do I store for my dairy-free family members?
-Canned coconut milk. I usually have a whole case on hand; I use it on a regular basis in recipes, so it gets rotated. Ditto for coconut cream. The best prices around for both of those was at a local Asian market.
-Coconut milk powder. Also from the Asian market. Check the label; some brands add casein to their powder. Since this is a milk protein, it’s unsuitable for the dairy-sensitive. Other brands don’t include casein.
-Boxes of shelf-stable coconut milk, almond milk, and/or rice milk. These need rotated about as much as the canned ones do.
-Almonds, rice, cashews, oats. Because we like and use them anyway.
What other questions do you have?


 RSS Feed