The Provident Homemaker
  • Recipes and Info
    • Making Bread
  • My Blog
  • Favorite Resources
  • Documents and Files
  • 52 Weeks of Building Storage

Voting quotes and information, things to do with that Halloween candy

10/28/2010

0 Comments

 
Picture
Hi everyone,

Are you ready to vote? I felt I should share some statements our church leaders have made.  Below, you will find some great web resources to help you be informed on the candidates, ballot items, and judges in our area.  I’m sure there are more out there; these are the ones I’m aware of.

Joseph Smith said: "Even this nation will be on the very verge of crumbling to pieces and tumbling to the ground, and when the Constitution is upon the brink of ruin, this people will be the staff upon which the nation shall lean, and they shall bear the Constitution away from the very verge of destruction."  In other places, Joseph referred to this time being when the Constitution would hang by a thread.  What is this last thread that is holding up the Constitution?  President Ezra Taft Benson told us that this “our franchise (a right granted) to vote."

John Taylor said that the Elders of Israel (remember that women couldn’t vote, yet) should “understand that they have something to do with the world politically as well as religiously, that it is as much their duty to study correct political principles as well as religious” (Journal of Discourses, 9:340)


“It is time, therefore, that every American, and especially every member of the priesthood, became informed about the aims, tactics, and schemes of socialistic-communism. This becomes particularly important when it is realized that communism is turning out to be the earthly image of the plan which Satan presented in the pre-existence. The whole program of socialistic- communism is essentially a war against God and the plan of salvation—the very plan which we fought to uphold during ‘the war in heaven.’” (Ezra Taft Benson, Secret Combinations, Conference Report, October 1961.)

Also see Ezra Taft Benson, The Constitution- A Heavenly Banner, and D&C 98:6-10 

This year there are four proposed amendments to the Utah Constitution, a number of races including the State Board of Education, a proposition for a bond, and 37 judges to vote on. If you go to https://vote.utah.gov/  you will find a box at the bottom of the page that says "What's On My Ballot?".  Click on this and it will ask you some basic questions that verify if you are a registered voter.  After this, it takes you to a screen that shows exactly what will be on your ballot when you go to vote.  There are lots of links there to learn more about everything on your ballot.

Vote.Utah.gov - you can click on race by judicial district. You can find your district at https://secure.slco.org/clerk/elections/index.cfm    

 Full Listing of Utah Candidates 

Project Vote Smart 2010 Ballot Measures,  or  Constitutional Amendments 

2010 Voter Information Pamphlet

As for voting on the judges, they each have a 'scorecard', found online on the Utah Voter Information Pamphlet, staring on page 37.  The scores are determined by the Utah Judicial Council, see http://www.utcourts.gov/committees/members.cgi?comm=1 for who this includes.  Please read what their definitions are, because that affects the judges' scores (for instance, their definition of 'integrity' doesn't completely match mine).     Good luck, do your homework, and go vote!

 + + + + + + + + +

Here are some simple things to do with Halloween candy, from Living On A Dime.com:

"After the kids are done Halloweening, I grab 24 candies for each child to save for a countdown to Christmas instead of buying the calendars in the stores. I usually keep them in a bag but you can get the kids to decorate shoe boxes or stick the candy to a calendar with tape."

 
Candy Bar Milk Shakes

1 cup mini candy bars, chopped
2 cups (1 pint) ice cream (chocolate or vanilla)
1/2 cup chocolate syrup
1 1/4 cups milk

Chop candies in a blender or food processor.   This is easier if they are partially frozen. Add the rest of the ingredients. Mix until blended. This makes a thick shake. Add 1/4 cup milk for a thinner shake. Makes 2 milkshakes, about 16 oz. each, or 5 shakes if you make them 6 oz. each!

 
0 Comments

The Celestial Nature of Self-Reliance, Lemon-Zucchini Bread

10/28/2010

0 Comments

 
Picture
(originally from 8/5/10)
Do you have garden produce yet?  Or are you seeing it at farmers' markets?  We got the first yellow summer squash of the year yesterday.  This is exciting!  Unfortunately, we don’t have zucchini at all because one of my little people stepped on the plants just as they were coming up.  I replanted, but didn’t water well enough that first week…


Fortunately, I still have frozen zucchini from last year.  I used to shred it and freeze it in quart bags, which was the proper amount for a double batch of my zucchini bread, but didn’t like how it thawed.  It separated into water and strings of fiber.  That’s kind of baffling to cook with.  There’s a much better way-  puree it! Chop the zucchini into chunks small enough to fit down your blender, and buzz until smooth.  A bonus is that the texture of your baked goods will be smoother. 

Our favorite recipe to use it is Lemon Zucchini Bread.  It has a little more flavor if you use fresh lemons, but is still good using bottled lemon juice and dried lemon zest.  Or use your lemon-zest-sugar, (find it in the archives under 'homemade orange seasoning', in the Spices or Seasonings category, right. And FYI, Zucchini bread, since it’s a ‘quick bread’, is simply a variation on the muffin recipe.   To see for yourself, go look at the 'Anything-Goes' Muffin recipe.                                          

 *  *  *  *  * 
Now, for the thought of the week- a First Presidency message from 1984, reprinted in the Ensign last year as one of the ‘classics’- “The Celestial Nature of Self-Reliance”.  Or, ‘what does self-reliance have to do with eternal life’? Think about it: Is food/money/water storage a suggestion or a commandment?  This article has something for any of us to work on- whether you haven’t started, are a little ways into it, making a lot of progress, or have built up all your reserves.  I HIGHLY recommend re-reading the whole article, below is a condensed piece of it:

 “Since the beginning of time man has been counseled to earn his own way, thereby becoming self-reliant. It is easy to understand the reason the Lord places so much emphasis on this principle when we come to understand that it is tied very closely to freedom itself.

Now, I wish to speak of a very important truth: self-reliance is not the end, but a means to an end.

Doctrine and Covenants 29:34–35 tells us there is no such thing as a temporal commandment, that all commandments are spiritual. It also tells us that man is to be “an agent unto himself.” Man cannot be an agent unto himself if he is not self-reliant. Herein we see that independence and self-reliance are critical keys to our spiritual growth.  Whenever we get into a situation which threatens our self-reliance, we will find our freedom threatened as well.  If we increase our dependence, we will find an immediate decrease in our freedom to act.

The key to making self-reliance spiritual is in using the freedom to comply with God’s commandments.”

For the whole article, which I know can bless everyone’s life,  go to The Celestial Nature of Self-Reliance at lds.org.

If using fresh lemons for this recipe, you'll need two. 

Lemon-Zucchini Bread


1 lb. zucchini or other summer squash (4 c. loosely packed, or 2 cups pureed)
¼ c. lemon juice*
2 Tbsp. fresh lemon zest, OR ½ tsp. lemon extract, OR 1/8 tsp (16 drops)    lemon essential oil
2 c. sugar
½ c. oil
3 eggs
3 c. flour
1 Tbsp. baking powder
1 c. chopped walnuts, optional

Place lemon juice, zest, sugar, and oil in a bowl and beat.  Add eggs, one at a time, beating well after each.  Stir in flour and baking powder, then add zucchini and nuts.  Pour into two greased and floured 9x5 loaf pans.   Or use three 8x4 pans.  Bake at 375 degrees about 50 minutes (40 for 8x4 pans) or until a toothpick inserted near center comes out clean.  Let cool in pans for 10 minutes, then turn out onto a cooling rack. Wrap or bag when completely cool. The flavor is even better the next day.


See the blender-mixing-method here.  

 *An acceptable substitute for lemon juice in this recipe is 1/4 cup vinegar (apple cider vinegar is better but not necessary) and a little bit extra lemon zest, extract, or essential oil.

 
0 Comments

link to "Top 10 Reasons for not starting food storage"; Curried Zucchini Bisque

10/27/2010

0 Comments

 
 How about another zucchini recipe?  Any summer squash can be used in the recipe.  Since I don’t have zucchini this year, (the seedlings were stepped on...) I’ve been making my lemon-zucchini bread with yellow summer squash, too. “Bisque” usually means a thick, creamy soup thickened by pureeing it, instead of by adding flour.  We made some yesterday using an immature Hubbard squash (picked by an enthusiastic child…), and it was delicious. The recipe came from the Ukraine; my sister ate it- and loved it- there on her mission.   In the bisque, the curry powder is great, but you can also  try other spices you like-   using basil or ground coriander  to taste, or a half packet of ranch dressing mix powder (Remember dressing mix is salty, so leave out the salt in the recipe).  The soup really shines when served with “Best Drop Biscuits” (archived under Quick Breads) or homemade French bread; something with some crunch to contrast with the silkiness of the soup. 

Here’s a video on YouTube about food storage, a lady from Arizona… this segment is “top 10 reasons for not starting food storage”: here if the link didn't work.  The sound doesn't work really well, but it's still worth watching!   http://www.youtube.com/watch?v=HhGaTlwYs-s      I thought it was pretty funny, but it makes you think.  Just remember that when she says ‘year’s supply’, that you don’t worry about that part until you reach Step 4 from the All Is Safely Gathered In booklet on providentliving.org. How much you store, on that step, is up to you to study and pray about.  Here are the four:

1. Gradually build a small supply of food that is part of your normal, daily diet until it is sufficient for three months.

2. Store drinking water.

3. Establish a financial reserve by setting aside a little money each week, and gradually increase it to a reasonable amount.

 4. Once families have achieved the first three objectives, they are counseled to expand their efforts, as circumstances allow, into a supply of long-term basic foods such as grains, legumes, and other staples.

 Happy storing! 
-Rhonda

 
Curried Zucchini Bisque
2 Tbsp. butter
2-4 tsp. curry powder- or use other spices you like
1 medium onion, chopped
¼ tsp. black pepper
3 c. chicken broth, or 3 c. water and 1 ½ tsp. chicken bouillon
1 (7-8 oz.) potato, cut in ½” cubes
1-1 ½ lbs. zucchini, trimmed and cubed
½ tsp. salt
1 ½ c. cream or evaporated milk (12 oz. can)  or a 12-oz. can of coconut milk

            Combine butter, curry powder, onion, and pepper in a medium saucepan.  Cook, stirring, for 2-3 minutes on medium-high heat.  Add broth, potato, zucchini, and salt.  Simmer 20 minutes or until potato is tender.  Add cream and puree the soup until smooth.         Serve garnished with croutons if you like.  Cubed chicken is also good in this. 

 
0 Comments

Summer squash and pumpkin powder, Foolproof Pancakes

10/27/2010

4 Comments

 
Picture
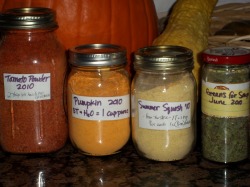
I love these powders!  Left to right: tomato powder, pumpkin powder, yellow summer squash powder, dried crumbled greens to put in soups in the winter.  (These greens are pigweed leaves- one of the wild edible weeds in my yard.)

Picture
Hot, fresh pancakes are simple to make. 

What else can you do with all that summer squash you have?  Make it into leather!  Yes, I know your children won’t think that’s the best snack around, but it’s not for them.  At least not by itself.  Better yet, turn it into powder.

The idea behind this is that pureed squash can be added to soups and breads (as in Zucchini Bread), and it takes a LOT less storage space when it’s dried.  There are at least two ways to get dried pureed squash:

(1)  Puree it, pour it on food dehydrator sheets, dry, and roll up, and

(2)  Slice the squash (1/4” wide is good), dry it like that, then run it through your blender when it’s crispy-dry.   This vegetable powder takes up even less storage space than the leather, plus it reconstitutes faster. If you're doing this with pumpkin, steam it before slicing; it will dry quite a bit faster and not have that raw taste.

(3)  Store it in something fairly airtight, in a dark area.  Canning jars are great, especially if you seal them by using a new lid, the ring, and an oxygen packet. (see Dry Canning.)

Now, how do you use it in recipes?  And how much do you use?  Remember thinking in school that you’d NEVER use  math in ‘real life’?  Ha!  It’s incredibly useful in the kitchen, especially when you start doing your own thing.

Measure and write down the quantity you start with, then measure and write down what you end up with.  Write it on your storage container, trust me, you’ll forget otherwise.   For instance, I started with 2 ½ lbs of yellow squash, which is 5 cups of puree.  I ran it through the blender, poured it on my (SPRAYED) dehydrating sheets, and turned on the dehydrator until it was dry and curling up on the edges and thin spots.  My sheets can fit two cups of puree each, which is one pound, so each roll of ‘leather’ is worth that much in a recipe.  To use it in a recipe, tear it up in pieces and soak it in just under 2 cups of hot water, for probably 30 minutes or so.   Then use it just like fresh puree, in whatever recipe you have.  There are photos and more detailed information on the Zucchini Powder post.

For making the powdered squash: the latest batch, 5 cups of puree, became just 10 tablespoons after drying and powdering.  That means to make one cup of puree, use 2 Tbsp. powder along with just under 1 cup hot water.   Isn’t that amazing? Think of the space that saves!  Five cups, which would have taken up freezer space, now stores in the space of about 2/3 of a cup.  The pumpkin I dried requires 3 Tbsp. plus water to make a cup.  This pumpkin powder bakes up beautifully in pies and breads.

 
When I make vegetable powder, it usually sticks to itself in a big lump after storing a little while.  Normally I just whack it a couple times to break off what I need, or chop around in the jar with a butter knife.  This time something new occurred to me- sometimes a little cornstarch is added to powdered sugar to keep it from lumping.  It’s a good moisture absorber, so my most recent batch has a little cornstarch added to it.  So far, so good.  We’ll see in six months how it really works.  Just in case that quantity messes with my recipes, I wrote how much cornstarch is there, on the jar of powder.  In this case, it’s 1 Tbsp. cornstarch per 2 cups reconstituted puree.  It looks like maybe more than necessary, but so far nothing is sticking!


You can powder about anything- think what you ever use in a pureed form, and make that into vegetable powder.  Tomato powder is great, it can be used to replace tomato paste, tomato sauce,  or tomato juice, depending on how much powder you use with how much water.  Mushroom powder is nice for cream-of-mushroom soup, or for extra flavor in soups and stews, onion powder goes almost without saying, carrot powder is good, too, and beet powder is sneaky but awesome. Throw it in almost anything.  I mostly use it to color frosting, though, since one of my boys can’t have artificial colors without his eczema flaring. It’s also great way to use beets that stayed in the garden a little too long and became a bit woody.  Try this out, and see what you think!


           Foolproof Pancakes -for my size family, we triple this
Makes 10 3" pancakes        (You can also turn this recipe into Pumpkin Pancake mix.)

1   cup   flour   (white or whole wheat)
1   cup   buttermilk or sour milk   
1   tsp.   sugar   
1/2  tsp.   baking soda   
1/2  tsp.   salt   
1   egg   
2   Tbsp.   butter, melted, optional

Combine all and whisk lightly.  Cook on a greased or non-stick skillet,  on medium-high, using 1/4 cup batter per pancake.  Cook until bubbles form around outside edges, then flip and cook until other side is browned.

The original recipe called for 3/4 cup buttermilk and 1/4 cup whole milk, but what I've got above works great.
For blueberry pancakes, stir 3/4 cup of blueberries into batter. 
For banana pancakes, slice one banana into batter. 
Picture
Cook pancakes on high heat, either on a greased or nonstick surface.  When the bubbles around the edges stay 'popped' and the edges are not runny, flip the pancake.

Picture
Cook until the other side is golden as well.  The pancake will puff up when you first flip it, and then it will stop rising.  If you're not sure if it's done, poke one in the center.  It shouldn't be runny.  If you flip the pancakes a second time, they will deflate and be more dense and flat.

4 Comments

What can I do to receive more blessings from God? and recipe: 'Anything-Goes' Muffins

10/27/2010

0 Comments

 
Picture
(originally 8/27/10)
Here's a scripture for today: Malachi 3:10 “Bring ye all the
tithes into the storehouse, that there may be meat in mine house, and prove me now herewith, saith the Lord of hosts, if I will not open you the windows of heaven, and pour you out a blessing, that there shall not be room enough to receive it.”


Have you, like me, received so much that it’s hard to fit anything else into your house, budget, or calendar?  It occurred to me that, like Elder Oaks’ talk, “Good, Better, Best," that in order to prepare with what’s MOST important, I need to inventory, evaluate, organize, and voluntarily pass on what is not ‘Best’.  This makes a house of order and frees up more space, money, and time with which the Lord can bless me with what will do the most good. To become more self-reliant and prepare for life’s adversities.  Also see D&C 109:8-9.

Yes, it takes work.  But work is good.  Work is what God does.


Here’s a recipe put together by my friend Laura Smith.  The column on the left gives you the basic ingredients, the column on the right gives you more information about them (or substitutions for them), and below tells you how to make variations.  If you want plain muffins, and you have all the regular ingredients, just use the left column and ignore the rest.  If you have some raspberries that have gone soft, and a raspberry-chocolate muffin sounds like exactly what you'd like to munch on, you will be able to make it!   This batter is also good cooked in a loaf pan, you’ll just need to cook it longer.   For instance, make the basic recipe using  mashed bananas….  and there’s banana bread for you.  I highly recommend you print this out- maybe tape it to the inside of your cupboard.  The 'Anything-Goes' Muffin recipe
 (Google Doc)
0 Comments

Gladness and Cheer, Just-Fruit-and-Nut Bars

10/27/2010

0 Comments

 
Picture
Picture
Picture
(Originally 9/2/10)

I love this time of year!  The temperatures have dropped enough that the roses are reblooming, the grass is having an easier time, and the mornings and  late evenings have the smell of earth and coolness.  The garden is in full swing, tomatoes are fragrant and sweet,  most of the lumps that come out of my garden are potatoes instead of rocks, and I get to be creative using squash again.  What a fulfilling time, enjoying the fruits of our labors (or others’ labors, if you prefer the farmers’ market or grocery store).  It brings to mind   D&C 59:18-19 “Yea, all things which come of the earth, in the season thereof, are made for the benefit and the use of man, both to please the eye and to gladden the heart;

   Yea, for food and for raiment, for taste and for smell, to strengthen the body and to enliven the soul.”

I’m grateful for the beauties of the earth that the Lord has given us, for the wonderful things he’s put here for us to wisely enjoy.  The recipe at the end of the email uses nothing but some of these things that grow for us. Enjoy!


Here is a bit from Elder Maxwell, from a talk he called “Be Of Good Cheer”- both sobering and encouraging. 


“We are living in a time in which we shall see things both wonderful and awful. There is no way that we can be a part of the last days and have it otherwise. Even so, we are instructed by our Lord and Exemplar, Jesus Christ, to “be of good cheer.” (D&C 61:36; D&C 78:18.)

Jesus has given that same instruction to others before, when the stressful circumstances in which they found themselves were anything but cheerful.

“In the world ye shall have tribulation: but be of good cheer; I have overcome the world.” (John 16:33; italics added.)

What precious perspective we obtain from the gospel of Jesus Christ concerning things that really matter—against which we measure the disappointments of the day!

Jesus calls upon us to have a deliberate trust in God’s unfolding purposes, not only for all humankind but for us individually. And we are to be of good cheer in the unfolding process. The Lord has made no secret of the fact that He intends to try the faith and the patience of His Saints. (See Mosiah 23:21.) We mortals are so quick to forget the Lord: “And thus we see that except the Lord doth chasten his people with many afflictions … they will not remember him.” (Hel. 12:3.)

Given the aforementioned grand and overarching reasons to rejoice, can we not “be of good cheer” in spite of stress and circumstance?

President Brigham Young said of a geographical destination, “This is the place.” Of God’s plan of salvation, with its developmental destination, it can be said, “This is the process”!   

(from “Be of Good Cheer” by Neal A. Maxwell,  Oct. 1982 Conference) http://lds.org/ldsorg/v/index.jsp?hideNav=1&locale=0&sourceId=1ca9c5e8b4b6b010VgnVCM1000004d82620a____&vgnextoid=2354fccf2b7db010VgnVCM1000004d82620aRCRD
If you can make the time, please read the whole thing, it’s wonderful!


Now for the recipe: these fruit/nut bars are basically the same as the old-old recipe for ‘fruit balls’ or ‘dried fruit candy’, if you’ve run across those before.  The dates are there both for sweetness and stickiness to hold the whole thing together.  

Just-Fruit-and-Nut Bars (the original 'energy bar') and naturally gluten-free!

1/3 cup chopped pecans - toasting the nuts will increase the flavor
1/3 cup chopped dates
1/3 cup chopped dried apples 

 Put the pecans in a food processor (or blender?) and chop until finely ground.  Remove and do the same with dates and apples.  Add the nuts back in, add a pinch of cinnamon, and process until it holds together.  Divide into 6 pieces, mold each one into a bar, and wrap tightly in plastic wrap, waxed paper, or parchment.  81 calories each, if you care.   (I’m thinking these things ought to be double-sized- plus I’ll make my batch with 1 cup of each ingredient.)

If you can’t have nuts: the nuts are there to give body and fat for shaping, digestibility and energy, so try a combination of chopped-up rolled oats and coconut oil (or butter)

Variations:

Apricot-Almond: use equal amounts dried apricots, dates, and almonds

Cherry Tart:  equal parts dried cherries, dates, and walnuts or almonds

Peanut Cookie: use peanuts and only dates (2/3 cup).  Add a pinch of salt and a bit of vanilla.

Cashew Cookie: same as Peanut Cookie, except use cashews.

How about using dates, dried pineapple, macadamias, then rolling in coconut?

Or use any nut and dried fruit you have, or whatever else sounds good…..

 
0 Comments

Rescuing old, stale bread; sustaining ourselves

10/27/2010

0 Comments

 
Picture
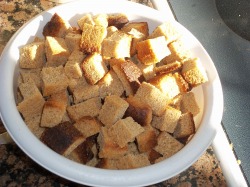
Caramel Bread Pudding using leftover bread.  This batch was made from some loaves I accidentally left cooking while I went to my son's concert.  Good thing it was short!!!  I trimmed off the burnt outside, then cubed it.

Picture
For some recipes, the drier and staler your bread, the better! 

(original date: 9/10/10)


This week I’ve got a couple recipes to help you ‘re-purpose’ some of that bread that might otherwise end up in the garbage.  If it’s dry, great!  If it’s crumbling, great! If it’s stale, perfect!  The only time you don’t use it is if it’s moldy.  Even then it’s still good for the compost pile, if it’s in an enclosed container to keep out rodents.  Meanwhile, here’s some food for thought from Brigham Young, one of the most practical of people.

“My faith does not lead me,” President Young said, “to think the Lord will provide us with roast pigs, bread already buttered, etc.; he will give us the ability to raise the grain, to obtain the fruits of the earth, to make habitations, to procure a few boards to make a box, and when harvest comes, giving us the grain, it is for us to preserve it—to save the wheat until we have one, two, five, or seven years’ provisions on hand, until there is enough of the staff of life saved by the people to bread themselves and those who will come here seeking for safety. … [The fulfillment of that prophecy is yet in the future.]

“Ye Latter-day Saints, learn to sustain yourselves. …  

“Implied faith and confidence in God is for you and me to do everything we can to sustain and preserve ourselves. …  

“You have learned a good deal, it is true; but learn more; learn to sustain yourselves; lay up grain and flour, and save it against a day of scarcity. …  

“Instead of searching after what the Lord is going to do for us, let us inquire what we can do for ourselves.” (Discourses of Brigham Young, Deseret Book, 1966 ed., pp. 291–93.) , quoted in Marion G. Romney, “Church Welfare Services’ Basic Principles,” Ensign, May 1976


Today’s recipes give you a couple good ways to not waste that dried-out, stale, or crumbly bread.  We have a little problem at our house with the heels of the bread- somehow I always find a heel or two in a bag at the back of the cupboard, dried out by then, of course.  Those either get turned into croutons or French toast right away, or get stuck in my ‘old bread’ bag in the freezer.  When I have enough, we make stuffing or bread pudding.


Homemade Croutons

 Cut bread into cubes and turn it into croutons: either sauté in, or drizzle with, olive oil or melted butter (1 Tbsp. for each 1-4 slices),  sprinkle with garlic powder, onion powder, dill, oregano, parsley, Parmesan cheese, ranch dressing mix (1/2 pkgs per loaf of bread), or anything that sounds like a good idea. Bake at 350 degrees for 15-20 minutes, or until dry and crispy.  Spread on a paper towel to cool, store when cool in a ziptop bag.  They’ll keep for a good couple of weeks, if you don’t eat them first.

________________________________

The ideal bread pudding is custard-y and creamy inside with a little bit of crunch on the outside. 
Basic Bread Pudding

12 slices bread, cut in 1” squares, (the more stale, the better! – or bake them)
½ -1 cup raisins, soaked, optional
1 Tbsp. cinnamon
3-6 eggs (less makes it more dry, more makes more of a custard)
¾- 1 ½ cups sugar, to suit your tastes, white or brown
¼ cup butter, melted
2 tsp.vanilla
½ tsp. salt
3 c. hot milk- ideally half-and-half, or one 12-oz can evaporated milk and 1 ½ c. milk
pinch ground nutmeg

 Mix together the bread, raisins, and cinnamon.  Dump into a 9x13 pan.  Using the same bowl as before, beat the eggs, then stir in sugar, butter, vanilla, and salt.  Mix until sugar dissolves.  Slowly mix in the hot milk.  Pour all of this over the bread, sprinkle with nutmeg, and let sit for 5-20 minutes to soak.  Bake at 375 degrees for 25-30 minutes, until center is set and a knife inserted in the center comes out mostly clean.  If you bake this in a hot water bath, it will come out more custardy.  Serve warm.  Very nice with a dollop of whipped cream, scoop of ice cream, or a drizzle of some kind of sweet sauce (vanilla sauce, caramel sauce, rum sauce, maple syrup, etc.)

 Variations: Use any dried or chopped fruit in this, (this is a great way to use those two lonely, shriveled apples sitting on your countertop!), shredded coconut, cocoa or melted chocolate (2-4 squares), chocolate chips, pecans or other nuts, rum extract, orange extract or zest.

For the liquid, you can substitute eggnog, hot chocolate, coconut milk, and about anything that sounds good.  One great combination is shredded coconut with chocolate milk..... 

 Even if you think you don’t like bread pudding, you’ll probably love this one:

 Caramel Bread Pudding- fills a 9x13 pan

15 slices good-quality white bread, cut into 1” pieces (about 16 cups)- baked until crisp (about 10 minutes at 450 degrees)
1 ½ sticks butter
2 cups light brown sugar
1 cup heavy cream or evaporated milk
¼ c. corn syrup or honey
5 tsp. vanilla, divided
3 c. half-and-half, or use  the last ½ cup evaporated milk from your can (above),use whole milk for the remaining 2 ½ cups here.  
5 large eggs


Melt butter and sugar together in a saucepan on medium-high heat.  Stir about 4 minutes, or until bubbly and golden.  Remove from heat and stir in cream or evaporated milk, corn syrup, and 2 tsp. vanilla.  Pour one cup of this caramel into a greased 9x13 pan.  Set aside one more cup of caramel, to use as topping later.  To the remaining caramel, add the half-and-half (or mixture of evaporated milk and whole milk).  Beat the eggs together, then whisk in the half-and-half mixture a little at a time.  Add remaining vanilla.  Fold in the bread, and let sit until soaked through, about 20 minutes. Meanwhile, heat oven to 350 degrees. Put bread mixture into the 9x13 pan, bake about 40-45 minutes, until the top is crisp and the custard is barely set.  Serve warm, with the reserved cup of caramel drizzled on top.

 
0 Comments

Progress with The Challenge, Althea’s Thyme Chicken

10/26/2010

0 Comments

 
Hi everyone,

This week, take a minute and look back.  How is your Three-Month Challenge coming?  Have you filled out the survey with your visiting teachers?  (It would be helpful to get them to me by this Sunday - but if you can’t, don’t give up!  Just do it soon.)  Have you figured out how much you need to feed your family for 3 months?  My friend Elizabeth said the easiest thing for her was to break it down by meals-  how much cereal, powdered milk, and pancake/syrup ingredients (or whatever your family prefers)  would it take to eat for a week?  Then multiply that by 12 to get your 3 months’ worth. Write it all down.  A food storage notebook (or spreadsheet, if you like that better) is a great idea.   Then tackle lunch.  Then dinner.  Her goal was one of those per day.

To find what you still need to buy, inventory next.  I know that sounds awful, but it really isn’t that bad.  I just keep picturing Joseph keeping track of everything in Potiphar’s house.  Now there was a good steward.  “The Lord made all that he did to prosper in his hand.” (Gen. 39:3)   I’d like to qualify for that blessing, too!  If you haven’t yet inventoried what you currently have, grab a notebook and start.  The easiest way for me is to write categories (i.e. canned vegetables, box of cake mix, bag/can of flour, etc.) and just write tally marks- or count and write down the number if you’ve got a lot.  After you inventory, sit down and compare what you need with what you have.  Remember, getting your three months’ worth is the hardest part of the whole food storage plan.  And you can do it!  You all have visiting teachers who’d love to help where they can.  We’re all here to help each other. 
 

This recipe is from my 6-foot-3, skinny-as-a-rail Jamaican roommate in college.  She only had time to cook once a week, so she’d make a big pot of either this or her chicken curry, then eat that all week.  Yummy stuff.  She never measured ingredients, so don’t worry about being accurate!

           Althea's "Oven Method"  Chicken     4-8 servings

8   pieces bone-in chicken (2-3 lbs., or use 1 lb boneless)   
2-3   tsp.  seasoned salt   
1   small to medium   onion,   sliced into rings
3-4   stalks   green onions,   cut in 1/2" pieces (if you don’t have this, use a little bit bigger onion)
¼   c.   butter or margarine   
2   sprigs   fresh thyme  or 1 tsp. dried  (if anyone local needs a plant, see me)
3-5    medium   tomatoes,   chopped 

hot cooked rice    


Put chicken in a bowl.  Add seasoned salt, onion and green onion.  Mix well; marinate at least 1/2 hour or overnight (or during the day). Remove onions and green onions; reserve.  Brown chicken in a skillet, or bake chicken on a cookie sheet or in a baking dish at 450  for 1/2 hour; turn chicken pieces over and cook 15-30 minutes or til juices run clear and meat is no longer pink when slashed.  Put onions and green onions in a large pot with the butter. Add thyme, chicken, and tomatoes.  Pour in about 1 cup hot water.  Cook on high til the water dries out (about 15 minutes- don't let chicken scorch!).  Add one more cup water- cook until it's HALF dried out, then it's done.  Serve over rice.

This is SOOOO good!

 
0 Comments

How much does a year’s supply cost? and Best Drop Biscuits

10/26/2010

0 Comments

 
Picture
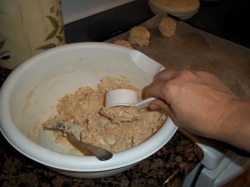
Once the dough is mixed, if you use a greased/sprayed 1/4 measuring cup to scoop the dough, you'll get a more traditionally-shaped biscuit.

Picture
Yum.  Tender and light on the inside, crunchy on the outside.  This batch was made with 1 cup whole wheat flour.

How much will your year’s supply cost you?  I just got an emergency supply store’s catalog in the mail; they advertised a year’s supply of food for ‘just’ $3649.95.  For one person.  Is it really that much money to get a year’s supply?

Adding up all the essentials, a month’s worth of food for one person is $16.23

                            A year’s worth for one person is  $194.76

Figure in that you’re getting your year’s supply after building your three-month supply; that knocks it down to getting nine months’worth;

                                                            $146.07 per adult.   

You CAN afford to get your home storage! 

If you really want to spend $3649.95 plus tax, you could buy a year’s supply for not just one person, but for NINETEEN people.  Yes, basic storage is different food than that ‘gourmet’ version, but here’s the counsel we’ve been given:          
"We encourage members world-wide to prepare for adversity in life by having a basic supply of food and water and some money in savings.” “For longer-term needs….gradually build a supply of food that will last a long time  and that you can use to stay alive” (fromAll is Safely Gathered In, First Presidency pamphlet)


Here is the cost breakdown:


Grains, 300 lbs- if you get just wheat and oats, at the cannery they cost between $5.80 and $8.15 for 25 lbs. depending on if you get white or red wheat, quick or regular oats.  If you average this out, it will cost you $6.98 per person, per month.  $83.70 per year’s worth.

Milk, 16 lbs is $1.40/lb at the cannery, which is $1.87 per month, $22.40 per year.

Sugar, 60 lbs is $ .56/lb there, $2.80 per month, $33.60 per year.

Oil, 10 qts –this isn’t sold at the cannery, but the price at Macey’s last week was $2.50 for 1 ½ quarts (48 oz.) At that price, after tax, it’s $1.43 per month, $17.17 per year.  It’s only $14.38 if you buy it at Sam’s Club ($6.98 + tax for 5 qts.)

Salt, 8 lbs- 4# box at Costco or Sam’s Club is a dollar; $ .16 per month, $2 per year.

Legumes, 60 lbs– the cannery sells black beans, pinto, and white, from $14.10 to $16.30 for 25 lbs.  Averaging the prices, it’s  $2.99 a month, $35.92 per year.

Water, 14/gal/person-   You can store this for free by using 2- and 3- liter pop bottles, or juice containers (not milk jugs- they break down).  Or use the 5-gallons square jugs or big blue barrels; they’ll run you about $1 per gallon of storage. 

When you’re done storing these items, you might decide to add a few ‘gourmet’ items- but that’s just extra stuff.

Notice that the costs were just for food, not containers to store them in. Most of my storage containers cost nothing.   You CAN get buckets for free, with a little effort- most bakeries give them away; all their frostings and fillings come in those buckets.  Plan on washing them at home.  There are two main sizes; 5 gallon and 2 1/2  gallon.  I keep packages of dried fruit in the smaller buckets, also cornmeal or other things that I don’t use as much.  They are a great size for a pantry, too.  Some of the buckets have gaskets, some don’t.  The ones that don’t seal well are still good for storing sugar. 

If you want all your wheat, powdered milk, sugar, and legumes in #10 cans from the cannery, it will cost you $85.83 more to get a full year’s worth, $65 to do 9 months' worth.

Here’s the year’s worth breakdown and quantities:    51 cans of wheat $137.80, 11 cans of beans $48.95, 10 cans of sugar $46.50, 4 cans of powdered milk $28.20.

 I don’t can my wheat, sugar, or beans because we go through large quantities; one batch of bread would use a whole can.  Pretty silly storage for me.  Besides, it’s easier for me to find space for 10 buckets than 60 #10 cans; they hold about  the same amount of food.


Best Drop Biscuits
 adapted from Cooks Country
Makes 12

 1 cube butter, melted and cooled a few minutes- set aside 1 Tbsp. of this.
1 cup cold buttermilk or sour milk  (1-2 Tbsp. vinegar in 1 cup regular milk)
2 c. flour
2 tsp. baking powder
½ tsp. baking soda
½  tsp. salt  (3/4 tsp. if you used unsalted butter)
1 tsp. sugar

 Heat oven to 475 degrees, no, that’s not a typo.  Mix together the butter (except reserved) and buttermilk; stir until the butter forms clumps.  (This is a faster way of getting the same results as ‘cutting in’ the butter.)  Mix all the dry ingredients together, then pour in buttermilk mixture.  Stir until just mixed in and dough pulls from side of bowl.   Drop onto  greased or parchment-lined cookie sheet.  A greased  ¼ c. measuring cup makes the perfect size scoop.    Brush with reserved butter.  Bake until tops are crisp and golden, about 12-14 minutes.    Serve warm.  These also reheat well the next day (10 minutes at 300 degrees) and freeze well, too.

You can use powdered milk in this: mix in 3 Tbsp dry milk powder when you’re stirring together the dry ingredients.  Use ice water  and 1-2 Tbsp. vinegar to make 1 cup, stir with the melted butter.

 
0 Comments

Year's Supply quantities, Roast Chicken Dinner with rice, and apple crisp

10/26/2010

0 Comments

 
Hi,

Remember  this?

"We encourage members world-wide to prepare for adversity in life by having a basic supply of food and water and some money in savings.” “For longer-term needs….gradually build a supply of food that will last a long time  and that you can use to stay alive” (from All is Safely Gathered In, First Presidency pamphlet)

Here is what a basic supply of food includes:  it will provide about 2200 calories a day, which means you’ll probably get 1800 and your husband will get 2600.  This is less than most people are used to, especially if you're suddenly living a 'more active' lifestyle, but it will keep you alive!

300 lbs grains- includes Wheat, Rice, Rolled Oats, Dried Corn, Popcorn, Flour, Pasta Products, Dried Potatoes.  Some lists say 400 lbs per person, but the current Church site says 300.  Take your pick, according to what you can handle.  Storage-wise or hunger-wise; that extra 100 lbs provides an extra 435 calories per day.

16 lbs. powdered milk- this is just enough for cooking, about ¾ cup per day.  You can store instant, regular powder, and canned milk.  It takes about 5 (12-oz) cans to equal one pound of powdered milk

60 lbs sugar- this includes white sugar, brown sugar, powdered sugar, honey, molasses, jam/jelly, corn syrup, fruit drink mix, gelatin.  If you have honey that crystallizes, set the bottle in the sun on a warm day, or put it in a pan of water on lowest heat overnight.  It will become liquid again.  You will want more sugar than 60 lbs. if you can your own fruit.

10 quarts cooking oil (2 ½ gallons)- yes, YOU NEED FAT.  Your brain is made mostly of fat.  Guess what happens if you don’t get any fat in your diet?  Plus, it’s a lot of calories for very little storage space.  The darker & cooler you keep it, the longer it lasts.  Fats include shortening, cooking oil, butter/margarine, mayonnaise, peanut butter.

8 lbs salt per person-  this is the cheapest of them all!   In addition to the round canisters, you can buy salt in 4-lb rectangular boxes; these stack together more efficiently.  At Sams’ Club, these boxes are just under $1.  Woo-hoo!  Two bucks and you have your personal salt for the year!

60 lbs. legumes, dried- includes soybeans, pinto beans, white beans, kidney beans, lima beans, anything that ends with ‘bean’ (unless it begins with ‘jelly’), black-eyed peas, split peas, and lentils.  These are a great, inexpensive source of protein.  Store the same as wheat- dry, clean, dark and cool  if possible. It takes 4 ½ (15 oz) cans to equal one pound of dry beans.

14 gallons water per person.  This is just 2 weeks’ supply, for drinking and a tiny bit for washing; the minimum our church leaders have counseled.  You may also want a way to purify water for longer-term use.  To purify, you can boil water for 2 minutes, or use chlorine bleach (plain only, not scented!)  If the water is clear, use ½ tsp. per 5 gallons of water.  If the water is cloudy, use double; 1 tsp. per 5 gallons of water.

Children do not need a full adult’s portion.  For them, figure age 3 and under= 50%, ages 4-6= 70%, ages 7-10= 90%, ages 11 and up= 100%.

Obviously, kids' ages are always changing, so when I calculate what to have on hand ( I inventory every Conference), I project out six months to a year. For instance, if someone is 6 years old, I count that child as 7 years. That way I'm not always slightly behind when it's time to replenish.

 * * * * *

Recipes today are for a whole meal….

Roast Chicken               From Living On a Dime, Jan 2010.  
Here is a very basic but yummy recipe. You can also put this in a crock pot to slow cook all day.


1 (3 lb.) whole chicken
Salt and pepper to taste
1 Tsp. onion powder
1/4 cup butter or margarine 
1 stalk celery, leaves removed

Season the whole chicken inside and out with salt, pepper and onion powder. Place breast side down in pan placing margarine and celery into cavity. Bake at 350° for 1 hour and 15 minutes or until internal temperature is 180° (82° C). You can baste with juices or melted margarine once or twice. Remove from oven and cover with foil for 30 minutes and let it rest before cutting.

You can easily adapt this recipe to your own likes and dislikes. For example, you might use garlic powder instead of the onion powder, you could slide slices of lemons or garlic cloves or even onion slices under the skin. Try other seasonings, too.

The main thing that makes this recipe great is cooking it breast side down, which makes it extra juicy.

Cheesy Peas and Rice

2 1/4 cups rice, cooked                                              
1 (10 oz.) pkg. frozen peas, thawed

1 (6 oz.) can of mushrooms, drained                          
6 oz. Velveeta, cubed*


Combine all the ingredients in a greased 1 1/2 qt. baking dish. Cover and bake at 350° for 20 minutes.

I didn't used to buy Velveeta because it was more expensive than other cheeses, but since it is the same price or less than cheddar now, I buy it more often.


Apple Butterscotch Crisp

This recipe is good served with ice cream or, for something different, try a slice of cheese or a dollop of sour cream.

 5 large (7 small) apples, sliced and peeled               
1 tsp. cinnamon

1 cup brown sugar, depending on your apples           
1/2 cup flour

1/2 cup quick cooking oatmeal                                      
1/2 cup butter or margarine, cold                                     

1 pkg. (3.5 oz.) cook and serve  
          
butterscotch pudding


Place apples in a greased 9x13 pan. Mix everything else in a bowl, cutting in* the butter until it resembles coarse crumbs. Sprinkle over apples. Bake at 350° for 40-45 minutes or until apples are tender.

You can leave out the butterscotch pudding; it won't throw off the recipe. It will still be delicious. 

*Whenever a recipe says to cut in something, that means to take a pastry cutter and mix the butter, margarine or shortening in with the dry ingredients until the mix gets crumbly looking. (I just use my fingers. It is easier for me to wash them than a pastry cutter.)

Roast Chicken Leftovers:

Chicken Spaghetti Bake-  Make your favorite spaghetti, mixing noodles and sauce. Instead of adding hamburger to it or leaving it without meat, add some cubed leftover chicken. Put it in a 9x13 greased pan sprinkle with mozzarella cheese and grated Parmesan cheese. Bake at 350° until heated through and cheese is melted.

Make Chicken Soup with leftovers- see the recipe for turkey soup.  Use ¼ the amount of water and spices for chicken because it’s so much smaller!

Leftover Leftovers- If you have any of this soup left, thicken it with a little cornstarch or flour mixed in water. Make a batch of biscuits or use any leftover biscuits you have and pour the thickened soup (now like gravy) over it.
0 Comments

Garden Seeds, homemade orange flavoring and EASY marmalade

10/26/2010

0 Comments

 
Picture
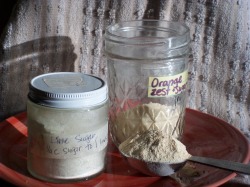
Make your own citrus flavoring by saving the peels, drying,  and powdering them with some sugar.  The marmalade recipe, below, is even faster.

Picture
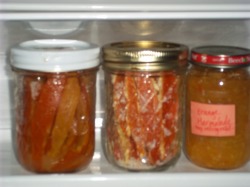
From left to right:  wet-canned candied orange peel, dried-first and then canned candied orange peel, orange marmalade.    Baby food jars are a great size to fill and give away with a loaf of bread.  I dress up the lid with a square of fabric, and secure with a ribbon or rubber band.


How is your 3-month supply coming?  I know some of you are past that; another post lists quantities for a year’s supply.  Once you have 3 months, remember it counts towards your full year, and long-term storage foods are the cheapest you can eat.  It will cost you less to get that remaining 9 months than it did to get the 3 months’ worth.

Now for this week’s information, the recipe is for something simple  to do with all those wonderful oranges that are in season right now.

President Benson said, “There are blessings in being close to the soil, in raising your own food even if it is only a garden in your yard and a fruit tree or two.  Those families will be fortunate who, in the last days, have an adequate supply of food because of their foresight and ability to produce their own.” –October 1980 General Conference

Between fall harvest and early spring is a perfect time to plan your garden.  A lot of stores already have their seeds in stock by February, and many seed companies have discount coupons to their sites online. 

I suggest starting small.  If you’ve never grown anything, start with just 1-4 types of vegetables your first year.  Some easy ones include lettuce, peas, radishes, beets, green beans, tomatoes, and pumpkins.   If you don’t have a garden spot, try growing them in a flower bed.  Or just tear out some grass.   You’ll water the same amount, but get food out of the deal.

The best resource around for Utah is the USU Extension office.  Their website is http://extension.usu.edu/  

For which varieties are known to produce well here, look at "Recommended Vegetable Varieties",  http://extension.usu.edu/files/publications/factsheet/pub__5657148.pdf

For more gardening info, go to the Horticulture Fact Sheets (shortcut is http://extension.usu.edu/htm/publications/by=category/category=43 )There is all the other info you'd want on growing any particular vegetable- when to plant, how much to fertilize, how much food you can expect from each plant, etc. 

For when to put your seeds in the ground, here's "Suggested Vegetable Planting Dates for the Wasatch Front", http://extension.usu.edu/files/publications/publication/Horticulture_Garden_2009-01pr.pdf   Nothing goes in the ground yet, unless you have a greenhouse.

I highly recommend testing your soil.  Last I checked, it was $15 per sample, going through the Extension Office. The linked article was from 1990, that's why it says the test is $10.  They suggest testing yearly, but one year’s  test will at least tell you what your soil needs to start with.  This will save you headaches, using the wrong fertilizer, or too much/not enough fertilizer.  Definitely worth it.  You'll earn the cost of the test back in fertilizer!   The article on this link is Testing Your Soil:  http://extension.usu.edu/files/publications/factsheet/HG_H_05.pdf   Typically I do 3-4 samples in my yard- front, back, side, and garden location.  Yes, there have ALWAYS been significant differences.

One more good article to read before you start; "Preparing and Improving Garden Soil" http://extension.usu.edu/files/publications/factsheet/pub__8066784.pdf 

For when to put your seeds in the ground, here's "Suggested Vegetable Planting Dates for the Wasatch Front", http://extension.usu.edu/files/publications/publication/Horticulture_Garden_2009-01pr.pdf

Hopefully this wasn't too big of a load to dump on you- just read what you can get to.  The above is good, basic, start-from-scratch information.   Do you have more specific questions?  The USU extension site will probably have an answer...

Good seed sources:  http://miniag.com/?page_id=316 (family business in Colorado, most seeds are $1 per packet, which is very good) http://www.seedstrust.com (specializing in non-hybrid, high-elevation- short season-, and heirloom seeds- with the best selection of tomatoes I’ve ever seen!), http://gurneys.com (they also have a coupon for $25 off a $50 order.  Most of my fruit trees have come from there), most grocery stores, Walmart, Lowe’s, Home Depot, local nurseries. IFA in Riverton (1926 W 12600 S) has bulk seeds- peas, corn, green beans.  I got a half pound of peas for the same price as a less-than-one-ounce packet.   

  It turns out that orange (or any citrus) peel is full of nutrition.  According to Answers.com, “One may be surprised to find that there is 2,000% of the daily recommended value of vitamin C, 100% of the daily recommended value of Calcium, and 90% of the daily recommended value of vitamin A in any type of orange peel.”     I certainly was surprised!  The pith (white part, bitter) is also very high in pectin, which is why marmalade thickens so well.  Pectin is a great fiber for your body and is a prebiotic.  Prebiotics help the probiotics live happily inside you. Compounds in citrus peel has shown in studies to be as effective as statin drugs for lowering LDL cholesterol.  Who knew?  All this means that if you’ve been saving and storing your orange peel (dried and ground up, or otherwise), you’ve been stashing away a multivitamin!

Homemade Orange Flavoring- preserving orange zest; this works for any citrus as well. 

Wash and dry 3-4 oranges.  (or as many as you like)

Use a vegetable peeler to peel all the orange off the outside. (eat the oranges!) Spread the peels on a plate, and let dry out for a couple days, until they’re thoroughly dry.  Drop them in a blender or food processor, add 1 Tbsp sugar for each orange you had, and run on high until peel is very finely chopped.  Store in an old spice jar, baby food jar, or a small jelly jar.  Label it.  2 Tablespoons gives you the zest of one orange, enough to flavor a batch of about anything; muffins, cakes, cookies, pancakes, whatever.  Use it in place of part of the recipe’s sugar. Also good as part of a spice rub for meats.

You don’t really need to add sugar, but it seems to help the zest hold its flavor longer, and makes it easier to have enough in the blender for it to chop well. If you’re not using sugar, 1 Tbsp. is the zest of one orange.


Another way to preserve oranges is


Easy Orange Marmalade

1 orange, washed well
Sugar or honey

Cut the orange into quarters, and put it, peel and all, in a blender or food processor.  Turn on and let it chop as fine or coarse as you like your marmalade. Look at how much puree you have, and use that same amount of sugar or honey.  Put the puree and sugar  in a saucepan and heat on high until it boils.  Simmer for 5 minutes, until everything is translucent.  You’re done.  Makes 1- 1 ½ cups, depending on your orange.  Or make a big batch, this will take more like 10 minutes of simmering.  Pour into jars, seal if you want to store it for a year or more.  I’ve kept it in unsealed jars in the refrigerator for 9-10 months before. They might have lasted longer, but we ate them first. 

Do you ever have oranges start to shrivel and dry out?  Turn them into marmalade, even if the peels are hard as leather.  It’s also delicious to make lemon or lime marmalade, or a mixture.  The lemon is my favorite, especially using just a bit of salt and vanilla – 1/8 tsp. salt, ¼ tsp. vanilla per cup of puree.

You can use marmalade as the sweetener in recipes; a cup of it has about ¾ c. sugar.  I love it in muffins.

Candied Orange Peels (short version instructions): save peels from 5-8 oranges, boil them in 3 changes of water, drain, cut in strips with scissors, simmer til translucent in 2 c. sugar and ½ water.  Roll in extra sugar while still warm. 

I usually keep these in a container in the fridge, but I've sealed them in jars (10 minutes in a boiling-water bath) when still hot, and also dry-sealed them after letting them thoroughly dry out on top of the cupboards for a week or two.
0 Comments

Water Storage, Powdered Milk recipes & notes

10/25/2010

0 Comments

 
Picture
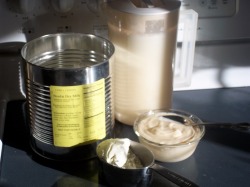
Powdered Milk from the Home Storage Center, $1.40/lb.  The bowl holds yogurt.  You can make plain yogurt as cheap as $ .42/quart, or $ .10/serving.

If you don’t have your water storage yet, what is a good price for water drums? Prices vary, but generally figure $1 per gallon of storage capacity.  The 55-gallon drums, then, will probably be $55 or less.  Once in a while they go on sale; I've found them at Macey's (our grocery store) for $40.  They're even cheaper if you can find them in the classifieds.  Only use food-grade drums. Empty pop bottles or juice bottles work great, but milk jugs break down fairly quickly and will leak.  If you are using  chlorinated city water,  you do NOT have to drain and refill these every year.  The First Presidency has asked us to store at least 14 gallons per person.  This is one gallon per person per day for 2 weeks. 
Attached are the recipes from yesterday's class on powdered milk.  Here's a list of what is there, and a few notes on them.  Sorry, it's a scanned-in document, so I couldn't go through and type in my notes.

Anyplace I've put cost of a recipe, it's based on the following: $1.40/lb for powdered milk, $13 for 25 lbs of sugar, $2 for a pound of butter, $8 for 25 lbs. flour.

For the recipes that give you whey (any of the cheeses, including the yogurt cream cheese), save the whey.  It has vitamins, minerals, some protein, no fat, and some milk sugar (lactose- very low on the glycemic scale).  I use it in pancakes, muffins, bread, etc.  If  your whey has vinegar in it (most of the cheeses use this), you can add 1 tsp. baking soda for every 2-3 cups of whey.  This will neutralize most of the vinegar.  Yes, it will foam up, kinda like those volcanoes you made in 3rd grade…

Go to http://everydayfoodstorage.net/training-cooking/powdered-milk  for  recipes for evaporated milk, Magic Mix, and Condensed Soups using Magic Mix. And she has a great little chart you can print out and tape to the inside of your cupboard  so you know how much milk powder to use when you're baking with it:

http://www.everydayfoodstorage.net/handouts/milk-conversion-charts.pdf

The Wooden Spoon class handout has a TON of info on powdered milk.  It is from some classes that the LDS Church's Welfare Square was teaching for a little while. The collection is not copyrighted; the two ladies who compiled it just wanted to spread the information.
   
When I get a bunch of new recipes, usually most of them get ignored unless I'm already familiar with them.  So let me familiarize you with all these possibilities....                        


 The first couple pages include:

what the difference is between regular and instant dry milk

storage times-  which are completely off!  Ignore what it says;  a BYU study shows that canned dry milk has been found to last 20+ years when kept at room temperature and below.

Mixing and drinking it- how to make it taste the best

Cooking with powdered milk

How much to store per person

How to determine if milk is past its prime shelf life

What to do with it if it's too old

Reconstituting chart

 
Now the recipes-

'whole milk' (powdered milk is powdered SKIM milk)

Buttermilk substitute

Evaporated milk- everydayfoodstorage link above gives quantities for a 12-oz can.  This costs $ .25.

Sweetened Condensed Milk – for the closest version to a 14-oz can, use

1/2 c. (non-instant) powdered milk
1/2 c. water
1 c.  sugar

0-2 Tbsp. butter

 If you like to be precise, use 1 1/2 Tbsp. less than 1/2 c. water (this also gives a slightly thicker result, like the can), but the first way is very close (yields 14 3/4 oz)    Other recipes use more -or less- of any of those ingredients.  Really, they all work. That said, the 'closest' version costs $ .39 if you use no butter, and $ .53 if you use 2 Tbsp.  What a deal! One important thing to know- these recipes call for hot or boiling water so the sugar gets completely dissolved. Otherwise you get grainy condensed milk.  I usually put my sugar with the water, then microwave and stir until the sugar dissolves.  Then blend with the milk powder and butter.


Hot Cinnamon Milk Mix- from an old 'Friend' magazine

Hot Caramel Milk Mix- like hot chocolate, only not!

Hot Chocolate Mix- one of many options out there, this one you just add water to.

Strawberry Shake- with a touch of orange to pep it up.  yummy.

Creamsicle Drink Mix- uses 3 Cannery products.  And it is really good.

Orange Julius- uses the church cannery orange drink powder.  You could use Tang if that's all you have.

Presoaked Wheat Blender Pancakes or Crepes- blender pancakes that are a little easier on your blender.  You just have to plan ahead with these.

Whole Wheat Pancake Mix

Fruit Syrup- no powdered milk here- just a really handy way to make a fruity topping for your pancakes.  The handwritten note says "Can use peaches canned in syrup and you just add cornstarch and cook"  Use 1-2 tsp. cornstarch per cup of syrup/juice.

Basic White Sauce

Cheese Sauce Mix- uses powdered cheese, pdr. milk and pdr. butter.  And onion powder.  (Remember my method of making onion powder?)

Low-Fat Cream Soup Mix -replaces 9 cans of condensed creamed soup, at $ .30 per can!

Potato Soup Mix-   very very easy.  (Well, they all are..)

Broccoli Soup- using all fresh ingredients except for the milk

Biscuit Mix- "Bisquick" where you add only water.  Use for any Bisquick recipes.  This makes as much as 2  40-oz boxes, at about $2.75/box

Honey Dinner Rolls

Whole Wheat Muffins

Weiner Schnitzel- not what you think, it's the old German dish.  Uses noodles, cheese, hotdogs.

Macaroni and Cheese- using the little 5-oz jar of cheese sauce.  This is a 'bag' recipe; everything can be put in a bag ahead of time and kept on a shelf (or given to a friend)

Microwave Caramels- mmmm

Whipped Topping- A little explanation here...  Evaporated milk will whip like cream if it is ICY-cold when you whip it.  This is glorified whipped evaporated milk, starting with the powder.  They add a few things for flavor, some oil for richness, and gelatin to keep it from going flat.  I think the gelatin gives it a strange consistency.  Next time I'll use a couple teaspoons of Instant Clear Jel.  Or cook some cornstarch with the water.  Or forget stabilizing it, and just eat it fast- maybe just whip evaporated milk and add sugar and vanilla to taste.

Fudgsicles-  don't these sound good?

Dry Milk Ice Cream- Bad name, but it uses sweetened condensed milk, which makes it really good.  The recipe claims to make a gallon, but it's really more like 2 quarts.

Peanut Butter Chews- similar to Bit-O'Honey if you use the honey instead of corn syrup.

Vanilla Pudding Mix- fat free, and has variations for chocolate and caramel pudding. When you make it, you add a tiny bit of butter and an egg, so it’s still lowfat, just not fat free.  If you cannot have wheat, substitute half as much cornstarch as the flour called for.

Plain Yogurt- really, this IS easy.  The recipe says it makes 2 quarts, but part of the water got left off the ingredients list.  Use 7 cups instead.  If you use your hottest tap water, this will be about right to start incubating.  You need the yogurt to start out between 105 and 120 degrees.  The lower end gives sweeter yogurt, the higher end makes it more tart. Wrapping the jars in a towel help keep it warm. Some warm areas to incubate it are- on top of a heating pad (cover with a  towel), an insulated cooler (I put in a jar of almost-boiling water to warm it up in there), a water-filled crockpot, a warm oven (an oven thermometer is helpful!  Hotter than 130 degrees will kill those friendly bacteria.).  Or get creative.  This costs only $ .42  per quart if you are using your own starter. 

Vanilla Yogurt- has gelatin in it, like most of the store-bought versions. This keeps it firm, even after stirring.  (Yogurt with no gelatin will become drinkable after stirring.)  If you want to use sugar instead of honey, use from 1 to 1 ½ cups.  And dissolve (boil) it in some of the water first, or it will settle to the bottom. You could use a package of flavored Jello- a 3 oz box is just under ½ c. of sugar, and  as much gelatin as one packet of unflavored.   Or use juice/syrup from canned fruit as part of your water.  Stir in fruit after the yogurt sets up.

Almond Crunch Granola- also no powdered milk, unless you count what you pour on top when eating this!

Strawberry Banana Smoothie- uses the yogurt you just made…

Yogurt-Fruit Smoothie- Banana-orange; uses yogurt as well as powdered milk

Yogurt Breakfast Waffles- yogurt makes them extra moist.  They also have a hint of orange and cinnamon in them.  I love these using the lemon yogurt.

Yogurt Dill-Veggie Dip- close to Ranch Dip

Yogurt, Berries, and Pecans on Crispbread- self-explanatory

Ranch Salad Dressing-  do you have any idea how much better fresh made is?

Fruit Yogurt Salad- uses vanilla yogurt and whatever fruit you have

Yogurt Parmesan Chicken- uses yogurt instead of mayonnaise or eggs to get the coating to stick.  Very good.

Granola, Yogurt, Berry Parfait- kinda like those little ones at McDonald’s, only you sweeten plain yogurt with honey.  You taste the fruit better this way.

Mock Mozzarella Cheese- about $1.50 per pound.  It only takes 10 minutes to make!  And it melts wonderfully.  Do use a blender to mix everything, otherwise the oil won’t mix in with the cheese curds and you’ll end up with a layer of oil on top of the whey.  (Make bread!)  NOTE- the recipe doesn’t tell you about salt.  Unsalted cheese is not very tasty.  I use 1 tsp. salt for this; I mix it in after rinsing the curds.   Even wrapping in cheesecloth, and pressing (under whatever heavy thing I can find) overnight, this hasn’t ever been cohesive enough for me to grate.  It crumbles, though. When I aged this for a couple months, it became very creamy and softer.  If you don’t have cheesecloth, you can use a piece of cotton fabric- something that will let the liquid drip out.  Cheesecloth can be found in some grocery stores in the kitchen tools section, or in fabric stores and Walmart over with the notions.

Parmesan Cheese- this is in already-crumbled form.  Best flavor after aging in fridge for 3 months, but still good used right away. 

Yogurt Cream Cheese, Yogurt Sour Cream- which one you make only depends on how long you let the yogurt drain.  16 ounces of yogurt will make just over 8 oz. of cream cheese, so it costs about $ .21  per 8 oz block.

Easy Homemade Cheese Ball- a cream cheese based cheese ball.  Use your yogurt cream cheese.

Mock Ricotta Cheese- about $ .84 for the batch, using your homemade yogurt.  ‘Real’ ricotta uses whey instead of milk, but normally you don’t have easy access to whey.  If you do (from making mozzarella?), use ¼ c. vinegar in 2 quarts whey, heat to simmering, then let sit for several hours for the curds to form.  Then strain through cheesecloth, salt,  and press.

Jalapeno Cheese- variation on the ricotta. 

Queso Blanco- this one does not melt; it holds its shape through cooking.

Homemade Cottage Cheese-  this makes the curds.  To make the creamy liquid the curds sit in, use a little yogurt, sour cream, or evaporated milk to the curds.  I like it with ¼ tsp. salt.  Add more if you like. The recipe makes about 8 oz. of curds and costs $ .36 

Cottage Cheese Scramble- a form of scrambled eggs, only mostly cottage cheese, with chives.  

Cheese-Stuffed Jumbo Shells- like Manicotti.  For those of you unfamiliar with it, this is similar in flavor to lasagna, only you use shaped pasta and stuff them, instead of doing layers.  The recipe calls for ricotta, cottage cheese, mozzarella, and Parmesan cheeses… but use what you have.  When I made it for the class, I used only cottage cheese, with mozzarella just on the top.  And only about a cup of spaghetti sauce.

Happy cooking!  

-Rhonda


0 Comments

Tamale Soup, Where Do I Get the Money (for home storage)?

10/25/2010

0 Comments

 
Picture
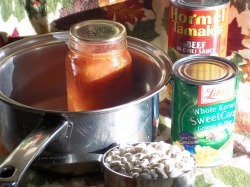
This is all you'll need to make this easy, flavorful, hearty soup.

This week I’ll start off with the recipe.  It’s a GREAT 3-month supply recipe, because everything in it is canned.  I grew up on it; my mom called it “Mexican Mix-up”, but eventually we just called it “Tamale Soup”.  Canned tamales can be hard to find (and $2 a can!), but Big Lots has them for $1.35.

Tamale Soup

1 (14-15 oz.) can beans (we usually used pinto, but whatever you prefer)-           or cook your own (1 cup dry)
1 (14-15 oz.) can corn
1 (14-15 oz.) can tomatoes- sliced, diced, or whole
1 (14-15 oz.) can tamales, unwrapped and sliced/chopped

 Dump everything in a pot.  Simmer together for 15-20 minutes.  Makes about 8 cups (2 qts.); 4-6 servings

 You don’t need to drain any of the cans, unless you’re trying to reduce salt.  If you are, add water equal to what you drained. You’ll lose flavor, though. 
We usually serve this with carrot sticks and a can of peaches or an apple salad- something colorful, a little sweet, crunchy, and light.


This week’s info is part of a General Conference talk years ago by Vaughn J. Featherstone, “Food Storage”:  He has some great ideas on where the money can come from.


(1)Start by taking an inventory—take a physical count of all of your reserves. This would be a great family home evening project if you’re prepared. If not, it may be terribly embarrassing to you in front of your family. Imagine how the powerful testimony you bear concerning a living prophet must sound to your children, who know that as a family head you have been counseled for years to have a year’s reserve of food on hand. We need to know where we are. Every family should take an inventory—get all the facts.

(2)     Decide what is needed to bring your present reserve levels to a year’s supply (or 3 month supply, if that’s what you’re working on). Then make a list and prepare a plan. Buy them from your monthly food budget allowance. The Church discourages going into debt to buy for storage.

(3)     Now that you know where you are and where you need to be, the third step is to work out a time schedule for when you will reach your goal. I suggest that one year from today we ought to have a year’s supply of food in all active—and many inactive—members’ homes in the Church. Do all you can within the laws of your community, and the Lord will bless you when the time of need comes.

Follow the prophet. He has counseled us to plant a garden and fruit trees. This year don’t just think about it—do it. Grow all the food you possibly can. Also remember to buy a year’s supply of garden seeds so that, in case of a shortage, you will have them for the following spring. I’m going to tell you where to get the money for all the things I’m going to suggest.

Store enough water for each member of your family to last for at least two weeks.

Now you ask, “Where do I get the money for these things? I agree we need them, but I’m having a hard time making ends meet.”

Here is how you do it. Use any one or all of these suggestions, some of which may not be applicable in your country:

1. Decide as a family this year that 25 or 50 percent of your Christmas will be spent on a year’s supply. Many families in the Church spend considerable sums of money for Christmas. Half or part of these Christmas monies will go a long way toward purchasing the basics. I recall the Scotsman who went to the doctor and had an X-ray taken of his chest. Then he had the X-ray gift-wrapped and gave it to his wife for their anniversary. He couldn’t afford a gift, but he wanted her to know his heart was in the right place. Brethren, give your wife a year’s supply of wheat for Christmas, and she’ll know your heart is in the right place. (side note- for 2009/10 prices, that’s $94.40 for a YEAR of wheat for one person… about the cheapest food there is!  I spend that much per person per MONTH for our regular food.)

2. When you desire new clothes, don’t buy them. Repair and mend and make your present wardrobe last a few months longer. Use that money for the food basics. Make all of your nonfood necessities that you feasibly can, such as furniture and clothing.

3. Cut the amount of money you spend on recreation by 50 percent. Do fun things that do not require money outlay but make more lasting impressions on your children.

4. Decide as a family that there will be no vacation or holiday next year unless you have your year’s supply. Many Church members could buy a full year’s supply of the basics from what they would save by not taking a vacation. Take the vacation time and work on a family garden. Be together, and it can be just as much fun.

5. If you haven’t a year’s supply yet and you do have boats, snowmobiles, campers, or other luxury possessions, sell or trade one or two or more of them and get your year’s supply.

6. Watch advertised specials in the grocery stores and pick up extra supplies of those items that are of exceptional value.

7. Change the mix in your family’s diet. Get your protein from sources less expensive than meat. The grocery bill is one bill that can be cut. Every time you enter the store and feel tempted by effective and honest merchandising to buy cookies, candy, ice cream, non-food items, or magazines—don’t! Think carefully; buy only the essentials. Then figure what you have saved and spend it on powdered milk, sugar, honey, salt, or grain (or what you need for your 3-month supply of food.)

The Lord will make it possible, if we make a firm commitment, for every Latter-day Saint family to have a year’s supply of food reserves by (a year from now). All we have to do is to decide, commit to do it, and then keep the commitment. Miracles will take place; the way will be opened, and next April we will have our storage areas filled. We will prove through our actions our willingness to follow our beloved prophet and the Brethren, which will bring security to us and our families.

Now regarding home production: Raise animals where means and local laws permit. Plant fruit trees, grapevines, berry bushes, and vegetables. You will provide food for your family, much of which can be eaten fresh. Other food you grow can be preserved and included as part of your home storage. Wherever possible, produce your nonfood necessities of life. Sew and mend your own clothing. Make or build needed items. I might also add, beautify, repair, and maintain all of your property.

Home production of food and nonfood items is a way to stretch your income and to increase your skills and talents. It is a way to teach your family to be self-sufficient. Our children are provided with much needed opportunities to learn the fundamentals of work, industry, and thrift. President Romney has said, “We will see the day when we will live on what we produce.” (Conference Reports, April 1975, p. 165.)

I should like to address a few remarks to those who ask, “Do I share with my neighbors who have not followed the counsel? And what about the nonmembers who do not have a year’s supply? Do we have to share with them?” No, we don’t have to share—we get to share! Let us not be concerned about silly thoughts of whether we would share or not. Of course we would share! What would Jesus do? I could not possibly eat food and see my neighbors starving. And if you starve to death after sharing, “greater love hath no man than this …” (John 15:13.)

Now what about those who would plunder and break in and take that which we have stored for our families’ needs? Don’t give this one more idle thought. There is a God in heaven whom we have obeyed. Do you suppose he would abandon those who have kept his commandments? He said, “If ye are prepared, ye need not fear.” (D&C 38:30.) Prepare, O men of Zion, and fear not. Let Zion put on her beautiful garments. Let us put on the full armor of God. Let us be pure in heart, love mercy, be just, and stand in holy places. Commit to have a year’s supply of food by (a year from now).

For the whole talk, go to:

http://www.lds.org/ldsorg/v/index.jsp?vgnextoid=2354fccf2b7db010VgnVCM1000004d82620aRCRD&locale=0&sourceId=dfa0fd758096b010VgnVCM1000004d82620a____&hideNav=1

I know his counsel is sound, and we will be wise, and blessed, as we follow it.

-Rhonda

0 Comments

Cooking and storing pumpkins, root cellaring

10/16/2010

0 Comments

 
Picture
You can even store summer squash alongside your pumpkins, if the summer squash is very mature, with a hard rind.

Picture
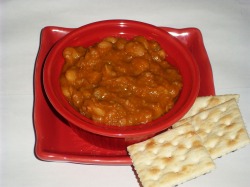
A bowl of thick, tasty Pumpkin Chili.  Don't tell your kids, and they'll never know....
Want to know what nutrients you're getting with that pumpkin?  A whole cup of it has only 49 calories, but is loaded with fiber, Vitamin C, riboflavin, potassium, and lots and lots of Vitamin A.  For the numbers, see nutrition for cooked pumpkin puree.
For the facts on its seeds, which are a great source of protein, Omega-6's, magnesium, potassium, zinc, copper, and manganese, see nutrition for pumpkin seeds.

Hi everyone,

This week we had a pumpkin class at my house.  It was fun, and I think everyone learned at least one new thing.  I have two different ‘handouts’; one is the Pumpkin class handout, two pages from the class; the other is a big collection of recipes I started in college, The Great Pumpkin Cookbook  (If it won't load, get it in two parts, here: The Great Pumpkin Cookbook part 1 and The Great Pumpkin Cookbook part 2).  I had asked a roommate if I could have her jack-o-lantern after Halloween.  When I told her I was going to make pie out of it, she incredulously responded with, “You can do that?  How?”  So I started by typing up instructions, and one thing lead to another…    

The Great Pumpkin Cookbook includes information on cooking pumpkin, canning, dehydrating, freezing, and ‘root cellar’ing it, plus things like Pumpkin Cheesecake, Pumpkin Shake, and Pumpkin Pancakes.  

If you want to learn more about storing vegetables through the winter, with or without a ‘real’ root cellar, click on Storing Vegetables At Home, which is a chart and information from the Wisconsin Extension Office.  
 

Here’s something to chew on, from the LDS Family Home Storage pamphlet; italics are mine:

Dear Brothers and Sisters:

Our Heavenly Father created this beautiful earth, with all its abundance,
for our benefit and use. His purpose is to provide for our needs
as we walk in faith and obedience. He has lovingly commanded us to
“prepare every needful thing” (see D&C 109:8) so that, should adversity
come, we may care for ourselves and our neighbors and support bishops
as they care for others.
We encourage Church members worldwide to prepare for adversity
in life by having a basic supply of food and water and some money in savings.  

 
And another, related, quote:

“Can we see how critical self-reliance becomes when looked upon as the prerequisite to service, when we also know service is what godhood is all about? Without self-reliance one cannot exercise these innate desires to serve. How can we give if there is nothing there? Food for the hungry cannot come from empty shelves. Money to assist the needy cannot come from an empty purse. Support and understanding cannot come from the emotionally starved. Teaching cannot come from the unlearned. And most important of all, spiritual guidance cannot come from the spiritually weak.  President Heber J. Grant declared, “Nothing destroys the individuality of a man, a woman, or a child as much as the failure to be self-reliant.”  -The Celestial Nature of Self-Reliance, Marion G. Romney

 
I challenge you to expand your home storage efforts, to find some part of it to learn more about, to try for the first time (or try better for the second-- or tenth-- time), to do something that will help you become a little bit more self-reliant. The Lord doesn’t ask us to do everything, all at once, but he does ask us to be diligent.  (See Mosiah 4: 27)  I know our capacity and freedom will increase as we do this.

-Rhonda

Here's some great information I found at http://www.americanpreppersnetwork.net/viewtopic.php?f=122&t=2166
"Only fresh and sound produce should be root-cellared. The food should be free from cuts, cracks, bruises, insects and mechanical damage. When I prepare produce for winter storage, I inspect it carefully. Items with any damage are either eaten quickly or canned or frozen. Apples and pears can be made into sauce, squash roasted and frozen, and beets pickled.

Quantities for a family of four:

Apples: 5 bushels
Carrots: 40 to 60 pounds
Cabbage: green, 20 heads; red, 10 heads
Beets: 20 pounds
Celeriac: (celery root, use instead of celery) 10 to 20 heads
Leeks: 40 plants
Potatoes: 100 pounds or more
Jerusalem artichoke: 10 pounds
Onions: 40 pounds
Garlic: 10 to 20 pounds
Winter radish: 10
Parsnip: 20 pounds
Squash: 40 ‘Delicata’ and 30 pounds butternut
Pumpkin: 5 to 10
Turnip and rutabaga: 10 or more"
0 Comments

The Challenge, and a story about old canned food

10/16/2010

0 Comments

 
Picture
 (note- this was originally sent as an email in January 2010) 
Happy New Year!    I took a break last week to visit family, it was great.  We only ended up with one bloody nose on the whole trip.  That wasn’t even on one of my children, it was a cousin, though it really was caused by one of mine.  Sledding.  And no one got hurt  when we went sledding on what my kids affectionately call "Death Hill"  later in the week.  Oh, wait, I did plow down a 3-year-old….   Oops.  My sled went diagonally instead of straight.  
 
SO…… onward and upward…...

How's your food storage?


With the new year, I have a new challenge for you:   If you haven’t got your 3-month supply yet, have it in place 3 months from now.   


 I promise that if you determine to do it, without going into debt, a way will be provided, and you will have more peace and security, knowing you are following the prophet’s counsel.    

 
Those of you who are past that step, congratulations! I am so happy for you!  What do you need to do next?  See the Family Home Storage pamphlet.  Set a goal and do it. If I can help you with anything, please let me know, I'd love to help.    

 
Here’s the first mini-challenge to meet the 3-month one-  

Sit down with your family on Sunday or Monday, during Home Evening works great, and get your kid’s input on their favorite meals.  Plan a menu for anywhere from a week and a half to a month.  Then go to the Three-Month Supply Excel Spreadsheet or  video on how to use it.  It will calculate all your quantities for you!   


Did you know food is a great investment?  You’ve may have seen this quote before; here’s a small piece of it, from J. Reuben Clark of the First Presidency (April 1937 Conference):  “put your money in foodstuffs and wearing apparel, not in stocks and bonds…”

Now here’s what food has done over the last ten years:  Corn- $215 worth of corn in 1999 was selling for $380 in 2009.  Wheat- $261 worth in 1999 cost $540 in 2009. And that doesn’t even account for inflation!  (if you want the source, it’s at http://futures.tradingcharts.com/historical/CW/1999/0/continuous.html )

In other words, buying your wheat for food storage was half as hard in 1999, only we didn’t know that at the time, did we?  But wouldn’t you still rather pay today’s prices than next year’s?  At the LDS Church Home Storage Centers  you can still buy wheat at 3-years-ago's price. The price of powdered milk there was a good price fifteen years ago! See Current Prices list.   Or watch for sales at local stores, find a local grower, or check out sites like Walton Feed.

If you’re worried about not rotating through your food fast enough, people have found wheat in Egyptian tombs and granaries that still sprouted.  And made good bread.  The proper storage temperature certainly helps.  And what about canned food?  Here’s what I found online.  (If you go to this site, they’ve got the history of canning, if you’d ever wondered about it…)  from http://www.internet-grocer.net/how-long.htm

“In 1820, William Perry (Parry) took an expedition in search of the Northwest Passage, toward the North Pole.  He took with him some canned meats.  At the time, food canning was about a 10-year-old technology.

At least one can of meat was not used and wound up in a museum in England.  In 1938, it was opened and found to be edible.  It was fed to a cat which suffered no ill effects from eating the 118-year-old meat.

Now, we're not saying that our canned meats, canned cheese and canned butter will last 118 years, but we're pretty confident that you can get at least a 15-20 year shelf life out of them, in light of this article. (The manufacturer offers a 3 year guarantee.)

And another- The steamboat Bertrand was heavily laden with provisions when it set out on the Missouri River in 1865, destined for the gold mining camps in Fort Benton, Mont. The boat snagged and swamped under the weight, sinking to the bottom of the river. It was found a century later, under 30 feet of silt a little north of Omaha, Neb.

Among the canned food items retrieved from the Bertrand in 1968 were brandied peaches, oysters, plum tomatoes, honey, and mixed vegetables. In 1974, chemists at the National Food Processors Association (NFPA) analyzed the products for bacterial contamination and nutrient value. Although the food had lost its fresh smell and appearance, the NFPA chemists detected no microbial growth and determined that the foods were as safe to eat as they had been when canned more than 100 years earlier.

The nutrient values varied depending upon the product and nutrient. NFPA chemists Janet Dudek and Edgar Elkins report that significant amounts of vitamins C and A were lost. But protein levels remained high, and all calcium values "were comparable to today's products."

NFPA chemists also analyzed a 40-year-old can of corn found in the basement of a home in California. Again, the canning process had kept the corn safe from contaminants and from much nutrient loss. In addition, Dudek says, the kernels looked and smelled like recently canned corn.”

That said, don’t ever use a can of low-acid food that is bulging.  That means bad things are growing inside- botulism, for instance.  If you have a can of tomato sauce, tomato paste, or tomatoes that is bulging a bit or squirts when you open it, that is NOT from botulism:  instead, it's from the electrolysis occurring between the acidic tomato and the can. (Not the best thing to eat every day, but okay occasionally.)  
 But don’t get stressed if you still have cans of green beans that are two years past the “best by” date.
  I’ve got some canned milk that was dated 2001 (in 2010); I can’t tell a difference between it and my newer stuff.  Still, the goal is to “STORE WHAT YOU EAT, AND EAT WHAT YOU STORE”.   Not to just let it sit.   Just do your best, and, as President Kimball always said, "DO IT"!  You will be blessed.


Sincerely,

Rhonda

 
0 Comments

White Sauce, both sweet and savory variations, quotes on work/prep

10/9/2010

0 Comments

 
Picture
A simple medium white sauce.  It will thicken as it cools.

Picture
To begin with, melt your butter over medium-high heat.

Picture
Next, add flour and salt; whisk until it's smooth.

Picture
Pour in milk slowly, whisking the whole time to get it smooth.  If you do this off-heat, it's a little easier. Bring to a boil, continuing to stir.

Picture
Once it boils and thickens (see top photo), you can use it as-is, or add any ingredients you like.  To this one, I added a bit of cayenne, garlic powder, black pepper, and about 1/2 cup of sharp Cheddar.  Your cheese sauce is NOT going to look like Kraft's, unless you add food color.  If you want a little more color than the cheese gives you, and don't want to add artificial color, add a bit of turmeric or crushed safflower strands.  Or some pureed carrots or pumpkin.

Picture
One of the possibilities...

Here are some great quotes on working and preparing….
“We will have to go to work and get the gold out of the mountains to lay down, if we ever walk in streets paved with gold. The angels that now walk in their golden streets … had to obtain that gold and put it there. When we have streets paved with gold, we will have placed it there ourselves. When we enjoy a Zion in its beauty and glory [which we’re looking forward to], it will be when we have built it. If we enjoy the Zion that we now anticipate, it will be after we redeem and prepare it. If we live in the city of the New Jerusalem, it will be because we lay the foundation and build it. … If we are to be saved in an ark, as Noah and his family were, it will be because we build it. …"  -Brigham Young 

“The revelation to produce and store food may be as essential to our temporal welfare today as boarding the ark was to the people in the days of Noah."  -Pres. Ezra Taft Benson

How’s your food storage?  I know there are great blessings, including increased freedom and peace of mind, from keeping this commandment.

-Rhonda


Fabulous, Adaptable


 White Sauce

I love ‘concept’ cooking, and I rarely follow a recipe because of that; I cook with whatever is in the house, fridge, or garden.  With white sauce, the concept is that flour or cornstarch will thicken things.  The thicker you want it, the more you use.  The only tricks are in knowing how to avoid lumps, and knowing which amount of thickener to use.  Just remember that 2 Tbsp. gives a good medium sauce consistency, then go down or up from that depending on what you want.  I use this formula for everything from pan sauces, to gravies, to “Cream of Mushroom Soup” replacements, to puddings and fruit sauces or syrups. 

___________________________

Here is the basic formula:

Medium White Sauce

2 Tbsp. butter or fat

2 tbs flour

¼ ts salt

1 cup  milk, cream, or stock

 To make it, use one of the methods listed on White Sauces, both sweet and savory variations.  Makes 1 cup sauce.


WHITE SAUCE USES:

Thin Sauce- Use as cream soups and other sauces, add whatever ingredients you want.

Medium Sauce - Use for creamed/scalloped dishes and gravies.

Thick Sauce - Use in place of a can of ‘cream of…’ condensed soups, or as a base for souffle.

For the recipes for thin sauce and thick sauce, 3 different methods of making White Sauce, and many, many variations, go to White Sauces, both sweet and savory variations
0 Comments

Shelf-life of spices, homemade onion powder, Creamy Turkey Soup

10/9/2010

0 Comments

 
Picture
Homemade onion powder.  The dried onions cost $2.50/lb at the LDS Church's Home Storage Center.
See the Home Storage Center order form.
What other seasoning (other than salt!) can you get for that much per POUND? 

When you grind up the onions, they reduce in volume by about half; the custard cup had been full before powdering.

Here’s something  from Providentliving.org:

“Three-Month Supply

Build a small supply of food that is part of your normal, daily diet. One way to do this is to purchase a few extra items each week to build a one-week supply of food. Then you can gradually increase your supply until it is sufficient for three months. These items should be rotated regularly to avoid spoilage.”

 
            I guarantee that if I didn’t have a bunch of spices in the cupboard and in storage, I wouldn’t have a “normal, daily diet”!   The holidays are a great time to stock up on spices and other baking supplies, as they go on sale a lot between November and the end of December.  Sometimes there's a 'Buy One, Get One Free' sale.   Two suggestions there:  either get double and be set for the next few years on that spice/extract, OR talk to  friends/neighbors and see who'd like to split with you.   I tend to think that neighbors helping each other that way helps build Zion anyway.  

            Now- how long are your spices good for?  Spice companies tell us to throw out herbs (leaves) after they are one year old, whole spices and seeds after 4 years, ground spices after 3 years,  as they lose potency, BUT- I'd rather have 6-year-old cinnamon than none at all!  I've had older, too, and found them to be fine.  Maybe not gourmet level, but still flavorful.   You can usually tell by smelling in the jar.  If there's not quite enough flavor when I cook, I just add a little more.  No problem.   The cooler and darker your storage area, the better they’ll keep their flavor.   It helps if they are good quality.  I’ve had a brand or two of cinnamon that tasted a bit like dirty bark to begin with. And you can’t always tell by price.   Sometimes I find good quality spices at the dollar store or Big Lots.  I’ve even been able to find almond extract, lemon, etc, there.

            The spices I use most  I buy in BIG containers (like 16 oz. or so)-  cinnamon, garlic powder, parsley flakes, and ginger- the big containers stay in the basement and are used to refill my little ones in the spice cupboard.  The big containers come from Sam’s Club or Macey’s, or whoever has a good price.  Smith’s sells spices in bulk over by their ‘natural foods’ section.  You get whatever quantity you want in a little baggie.  It’s usually a lot cheaper than in the little jars.  And if you like onion powder, you can make it yourself much more inexpensively with the dried onions from the DryPack Cannery- $2 a pound! That’s dirt-cheap for spice. See below with the other recipe.

 
                Spice Things Up! 

from The Wooden Spoon Cooking School, taught for a short time at the LDS Church's Welfare Square.
 
    Basic food storage can be pretty drab.  If the idea of living off of basic ingredients for a substantial amount of time already makes you want to turn green, then you quickly need to add to the basics you already have.  Seasonings and spices will add variety and store nicely!

    Beef, chicken, or ham bouillon granules are excellent secondary storage items.  Wheat and rice, either brown or white, cooked in bouillon, take on wonderful new flavors, as does barley.  In fact, bouillon is an excellent base for many soups, sauces, and casseroles.

    Soy sauce, with its Oriental flavor, is another excellent seasoning.  Fried wheat or rice with fresh vegetables and sprouts is enhanced with soy.  It also adds good flavor to a stir-fry or even to some stews, chicken, or fish dishes.

    Legumes respond well to seasoning salts and spice blends like chili powder, curry powder, poultry seasoning and celery, garlic, and onion salts.

    It is important to keep some sweet spices on hand, such as cinnamon, nutmeg, cloves, ginger, and allspice.  Simple rice pudding, for example, is dependent on such spices for its unique flavor.  The simplest cookies and cakes are enhanced with their use.

    Dried parsley, basil, oregano, marjoram, and rosemary are great to keep in supply.  They can be added to any dish for “Italian” flavors, or added to a simple stew to compliment the natural flavors of the other ingredients. 

    Cocoa, sweet cocoa mix, or a cereal drink like Ovaltine is a good supplementary item to store along with the basic nonfat dry milk.  Punch powder is a welcome flavor in lean times.  Nor should we forget vanilla, almond, maple, and lemon extracts.  All of these items store well.

    Many of these items can be bought in bulk at warehouse retailers (Sam’s or Costco), and can be stored for a great length of time.  As with all food storage items, these should be rotated regularly.  A year’s supply of flavorings could make the big difference between stark or satisfying eating.  

 * * * * * * * * * * * * *

Here's a simply way to get some inexpensive seasoning:
Homemade Onion Powder


2 cups dried onions
1 8-ounce jar with lid (label it!!!)

 
Put the dried onions in a blender and food processor, chop until powdery.  Pour into your jar.   Done.  

 
What else I like to know about it: 2 Tbsp. of onion powder is equal to about 4 Tbsp. (1/4 c.)  dried onions, which is about 1 medium onion.  SO- when your chicken noodle soup, or whatever, calls for 1 medium onion, dump in 2 Tbsp. of onion powder, and your (my!) kids won’t complain about onions in the soup.   Some of my children THINK they don’t like onions- but they say the soup “doesn’t taste right” the times I’ve left them out.  So now I’m sneaky.  I guess they just don’t like the texture.


Easy Creamy Turkey Soup     

Ready In: 35 min.    Yield: 4 ½ -5 cups

1   Tbsp.   dried minced onion, or 1 ½  tsp. onion   powder
1   stalk   celery, sliced in 1/4" pieces   
1   can   (10-3/4 oz.) cream of celery soup ( or cream of chicken, or mushroom)     
1/4   tsp.   thyme     or rosemary
1-1/2   cups   cubed cooked turkey   
3   large   carrots, cut in 1/4" pieces   
1/2   to 1 cup   milk   
1   cup   frozen peas    


            Mix together onion, celery, soup, thyme, turkey, and carrots.  Stir in enough milk to make the consistency you like.  Bring to a boil, then cover and simmer 25 minutes or until vegetables are tender.  Stir in peas and remove from heat.  As the peas heat through, they’ll cool your soup enough to eat it.


To make this faster, you can microwave the celery and carrots, covered and with 1 Tbsp. of water, for 5-10 minutes or until tender. Then just heat the soup until the peas have thawed through.  This will reduce your total cooking time by about 15 more minutes. 

 
This is also good using leftover Christmas ham instead of leftover Christmas turkey, though I’d substitute a couple cubed potatoes or a can of green beans for the carrots.  

 
-Rhonda

 
Here's some great info-

If you click on no other link, check out the spice chart (#3)

 
(1)The dozen "most essential" spices

http://www.spiceadvice.com/newsa/usage/staple_spices.html

 
(2)how, when, and how much spice to add:

http://www.spiceadvice.com/newsa/usage/adding.html

 
(3)quick reference spice chart: what different herbs and spices taste good with:

GREAT for printing out and taping on the inside of your spice cupboard!

http://www.spiceadvice.com/newsa/usage/chart.html

 
(4)details on each spice: the spice encyclopedia

http://www.spiceadvice.com/encyclopedia/index.html

 
(5)antioxidants in spices:    remember hearing how awesome pomegranates and blueberries are for containing antioxidants?   1 tsp. of cinnamon has more than a whole cup of pomegranate juice or a half cup of blueberries.  Several other spices are also high.

http://www.mccormick.com/~/media/Images/ORACChart.ashx

 
0 Comments

Earthquake shelves, quick soft breadsticks

10/6/2010

0 Comments

 
Picture
I found this method of securing jars, by accident, just trying to maximize my shelf space.  The metal shelves we bought have a wide lip, which normally means there is a 2" space between the top of your food and the bottom of the shelf up.  It turns out that the lip can be used to keep jars on the shelf. 

Picture
I have to tip the jar to get it in, and then it stays put!  About 3/4" of the top of the jar is hidden- and trapped- by the upper lip of the shelf.

Picture
Another option is to run rope, thick string, or bungee cords in front of the jars. Usually I just wrap the rope around the endposts of the shelf to secure each one, but do whatever works.  

Another thing to consider is keeping your shelves from tipping over.  You can buy an L-shaped metal bracket at Home Depot or Lowe's for a couple dollars, use a couple screws to secure one side of the L to the top of your shelf, the other side to the wall.  MAKE SURE IT'S SCREWED INTO A STUD! This works well for bookshelves, too, which is a good thing for people like me whose children often climb when I'm not looking.... 

Picture
This week's information is on earthquake preparedness. Have you read up on the local earthquake hazards?  I read a rather lengthy report on hazards in Utah, and just laughed at the section on earthquakes-  pretty much any scenario that might happen somewhere in the world, can happen here on the Wasatch fault.  Some of these things sounded wild- like the whole valley floor tipping and allowing Utah Lake to fill up most of the Salt Lake Valley, or liquefaction of soils (basically, the ground turns to quicksand during shaking, and tall buildings fall over on their sides).  There are 2 main types of "events", as they're called, and we're due for both of them.  For instance, one type (non-surface-faulting, if you want the name) happens every 300-400 years, and it's been 350 years since the last one.  If the LDS Church decided it was important enough to spend the money to retrofit the Tabernacle, and to build the Conference Center to far exceed earthquake building standards, don't you think it's worth doing the simple things at home you can?

Most injuries are from things falling, not from building collapse.  Plus, I don't know about you, but I'd sure hate to lose a summer's worth of canning because they rattled off their shelves.  Or to have my storage area full of broken glass, nevermind the food that had been in them.  There are some very simple, cheap things you can do to secure your food storage.  I don't know how they'd do in the worst-case-scenario earthquake, but it'd be better than nothing.  The pictures above show a couple options. 

The State of Utah recently published a booklet about planning for earthquakes, "Putting Down Roots in Earthquake Country".  It's full of good info. Pages 22-23 have more information about keeping your belongings from crashing all over during an earthquake. Here's the link:

http://ussc.utah.gov/publications/roots_earthquake_low.pdf     

 
And for those of you in my neighborhood who ever wondered if there was anything good about our dirt here, there is a silver lining to all that nasty rock in our yards- our soil here in Glenmoor (South Jordan), combined with the location, has the lowest chance of turning to quicksand (liquefaction).   We're also as far from a faultline as you can be in this valley.  (Which really isn't saying much, but every little bit helps!)

 
P.S.   Do you know what our schools' emergency plans are?  Where and when do you get your children if they're at school?    I called our elementary and  middle schools to find out, and the short answer is- stay home until THEY (the schools) contact YOU.  They'll go in lockdown if they need to, or stay outside in good weather, or in case of bad weather or a severely damaged school, the Glenmoor church building is the fallback for Welby; the Dunsinane building and/or Walmart (really!) is the one for Elk Ridge.  When things are safe, they'll allow the students to call home, or you'll get a message via the radio, TV, Internet, etc.

 
Now for the recipe....

Quick Soft Breadsticks

Ready in 20-30 min. Yield: 12 breadsticks

1 1/4 cups flour (measure this one by scooping, NOT by spooning it into the cup)
2 tsp. sugar
1 1/2 tsp. baking powder
1/2 tsp. salt
2/3 cup milk
3 Tbsp. butter melted
2 tsp. sesame seeds

Mix flour, sugar, baking powder and salt. Gradually add milk and stir to form a soft dough. Turn onto a floured surface; knead gently 3-4 times. Roll in a rectangle, 10"x5" and 1/2" thick. Cut into 12 breadsticks. (A pizza cutter works best for this.) Place butter in a 9x13 pan. Place breadsticks in butter and turn to coat. Sprinkle with sesame seeds. Bake at 450 14-18 minutes or til golden. Serve warm.    We double this for my family, and bake on a 12x18" cookie sheet.

This dough is very soft. If it's too sticky for you, use lots of flour on the counter when rolling, and be sure to cut with a pizza cutter!

 
0 Comments

Making and using tomato powder

10/6/2010

5 Comments


Picture
Making tomato powder: start by partly-filling your blender or food processor with COMPLETELY dried tomatoes.

Picture
Run blender until ground to a powder.  I usually add a tablespoon of cornstarch to this, to help absorb moisture so they don't clump during- or after- storage.

Picture
Pour into a canning jar or some other airtight container. 

Picture
Label the jar with the year and what's in it.  My label reminds me that there's a little bit of cornstarch in it.  Store someplace cool and dark for the best shelf life.  It should retain most of the vitamins for a year, and the calories and minerals for longer than that.  If you add an oxygen packet, use a new canning lid, and screw the ring on tight, the oxygen absorbtion will create a seal.  I don't know how much longer the powder will store with the oxygen removed, but I figure it's got to be at least double or triple. 

Picture
One use for your tomato powder- this is going to be pizza sauce, as soon as the hot water is added.  For 8 ounces of sauce, use 1/4 cup tomato powder, 1/4 tsp. salt, a few sprinkles each of garlic powder, black pepper, basil, and oregano, and a few fennel seeds if you like.  Stir in 1/2 cup hot water, then let it sit for a few minutes.

Instead of canning tomatoes, I've started dehydrating them.  This was really handy when I first had too many tomatoes to eat, but not enough for a full canning batch.  Once they're REALLY dried, I run them through the blender or food processor to make powder.  My kids can do all the cutting, then load them on the trays.  I fill a quart jar, add an oxygen packet (from the Church cannery), put on a new lid, screw on a ring, and they seal within about twenty minutes.  Six quarts' worth of tomatoes fit in one quart jar, this way.

 
Use the powder in place of any tomato product- tomato paste, tomato sauce, crushed tomatoes, tomato juice, whatever you need.

 
It takes 1/4 c. powder, 1/2 c. hot water, and 1/8- 1/4 tsp. salt to yield one 8-oz can of tomato sauce.  Add spices to  turn it into pizza sauce.

 
More details on making the powder: if the tomatoes are small (cherry tomato size, I cut them in halves or quarters, otherwise I slice them about 1/4" thick.  Dry until they are completely dried. I fill the blender (food processor would work, but I don't have one) to about the 4-cup mark, add a tablespoon of cornstarch to act as a moisture absorber during storage (optional), and turn it on until well powdered.  To store, I've been putting them in canning jars, adding an oxygen packet, then topping with a new lid and a jar ring.  This way, they seal.  

It is not necessary to use the oxygen packet, and I don't have facts on how much it extends the shelf life.  Most dehydrating books say that you still have maximum vitamin content in dehydrated for for one year, and that's without the packet.  My line of reasoning is that taking out the oxygen should at least double or triple the shelf life, plus sealing the jar keeps humidity out.   Just make sure there is no moisture in your food before powdering it, or it will clump and maybe mold.  It often clumps after opening a jar, when I keep it in my cooking cupboard, but it's still completely usable, and the cornstarch can help prevent clumping.   When drying, though, the essentials are to get the food as dry as possible, and store it at least fairly airtight, dark and cool is ideal.

 To use tomato powder , I usually just toss in enough  to 'make it taste right" into whatever soup I'm making, but if you want conversions,  here's what I've figured out:

one 6-oz can of tomato paste: 1/4 c. tomato powder, 1/4 c. hot water, 1/4 tsp. salt
8-oz can of tomato sauce: 1/4 c. powder, 1/2 cup hot water, 1/4 tsp. salt
14-16-oz can crushed tomatoes: 1/4 c. powder, 3/4 c. hot water, 1/4-1/2 tsp. salt
8 oz. tomato juice: 2-4 Tbsp  powder, just under 1 cup hot water, 1/16-1/8 tsp. salt

So the tomato powder-to-water ratio for each one is:

Tomato paste: 1:1
Tomato Sauce 1:2
Crushed tomatoes: 1:3
Tomato juice: 1:4-8

And, of course, you may add any herbs or spices you like.


5 Comments

Invest in food and clothes; homemade granola and "Honey Clusters of Oats"

10/4/2010

0 Comments


Picture
The recipe below is one of the main reasons I buy cornflakes anymore.  It’s my mom’s homemade granola.  Very easy, but very dense food.  So I added the box of cornflakes to it, and voila! Now it’s homemade “honey clusters of oats”!  It makes for a lighter-weight breakfast.  

 Here’s my thought on food storage this week:  There may be huge disasters where we need food storage, but we all have reasons for food storage that don’t involve major disasters- all it takes is the breadwinner getting hurt, losing a job, having a major hospital bill, all kinds of things.  Something happens to everyone, sometime. Here’s a question to ask yourself.  Is your food storage a higher priority than owning a TV or a second car?  “Wait,” you say, “WHAT?”  Read on:

A really excellent talk is “Prepare for the Days of Tribulation”  by President Ezra Taft Benson. Here’s a little piece from it: “Let every head of every household see to it that he has on hand enough food and clothing, and, where possible, fuel also, for at least a year ahead. You of small means put your money in foodstuffs and wearing apparel, not in stocks and bonds; you of large means will think you know how to care for yourselves, but I may venture to suggest that you do not speculate. Let every head of every household aim to own his own home, free from mortgage. Let every man who has a garden spot, garden it; every man who owns a farm, farm it.” (President J. Reuben Clark, Jr., in Conference Report, Apr. 1937, p. 26.)

You do not need to go into debt, may I add, to obtain a year’s supply. Plan to build up your food supply just as you would a savings account. Save a little for storage each pay-check. Make your storage a part of your budget. Store seeds and have sufficient tools on hand to do the job. If you are saving and planning for a second car or a TV set or some item which merely adds to your comfort or pleasure, you may need to change your priorities. We urge you to do this prayerfully and do it now.”  (I highly recommend spending the 5-10 minutes to read the whole talk.  This is also the time where we find his famous quote about food storage being maybe like Noah’s ark for us.)

Is your food storage a higher priority than owning a TV or a second car?!

 
And now the recipe:

Homemade Granola and “Honey Clusters of Oats”

10 cups quick oats (rolled oats are OK too, just crunchier when baked)      P.S.- a full #10 can  is about 13 cups- take out 3 cups and the rest is the right amount.
1 (7 oz.) bag of coconut (leave out if you don’t like coconut)
1 (18 oz) box  of cornflakes
1-2 c. chopped nuts, optional
1 cup honey, corn syrup, or maple syrup (pancake syrup)
1 cup brown sugar
¼ c. water
1-2 cups raisins, dates, or other dried fruit


In a really big bowl, stir together oats, coconut, cornflakes, and nuts. Combine honey, brown sugar, and water in a small saucepan.  Bring to a boil, stirring just until the sugar is all dissolved. Pour over the stuff in the big bowl, stirring well to coat.  Spread about ½” deep onto ungreased cookie sheets, then bake at 300 degrees until lightly browned (I think about 30 minutes) You can put 2 trays in at once, on different racks.   When cool, stir in 1-2 cups dried fruit bits if you want to.   Store in an airtight container (like your now-empty #10 can, or an ice cream bucket).  It will keep for several months, especially if in a cool and dark area.  It won’t ever “spoil” unless it gets wet.  The only problem I’ve had is for it to get stale after a long time. It’s still nutritious, though.  The nuts could go rancid too, but I’ve never kept it long enough for that.

-Rhonda
0 Comments
<<Previous

    Need a Search bar?
    One day I may upgrade my website-- but until then, use your web browser search bar. Type in my web address and what you're looking for, like this-- 
    www.theprovidenthomemaker.com  pumpkin --  and you should get results.


    Author

    I'm a disciple of Christ, a member of the Church of Jesus Christ of Latter-day Saints, a family-defending, homemaking, and homeschooling mom of eight children, two of whom sometimes can't have milk or wheat. Growing up on a farm in a high mountain valley, my parents taught me to 'make do', work hard, smile, and help others.  I love cooking, learning, growing food and flowers, picking tomatoes, and making gingerbread houses --which CAN be made allergy-friendly-- with my children.  I hope you find something to help you on my site!

    Archives

    April 2024
    July 2023
    April 2022
    September 2021
    March 2021
    December 2020
    April 2020
    March 2020
    February 2020
    January 2020
    December 2019
    November 2019
    October 2019
    September 2019
    August 2019
    July 2019
    June 2019
    May 2019
    April 2019
    January 2016
    November 2015
    October 2015
    September 2015
    March 2015
    February 2015
    November 2014
    October 2014
    September 2014
    August 2014
    July 2014
    June 2014
    May 2014
    April 2014
    March 2014
    February 2014
    January 2014
    December 2013
    November 2013
    October 2013
    September 2013
    August 2013
    July 2013
    June 2013
    May 2013
    April 2013
    March 2013
    February 2013
    January 2013
    December 2012
    November 2012
    October 2012
    September 2012
    August 2012
    July 2012
    June 2012
    May 2012
    April 2012
    March 2012
    February 2012
    January 2012
    December 2011
    November 2011
    October 2011
    September 2011
    August 2011
    July 2011
    June 2011
    May 2011
    April 2011
    March 2011
    February 2011
    January 2011
    December 2010
    November 2010
    October 2010
    September 2010

    Categories

    All
    Alcohol
    Alternate Cooking
    Appearances
    Apple
    Apricots
    April Fools
    Aprons
    Bananas
    Beans
    Beef
    Beets
    Bench
    Beverages
    Bonnet
    Bread
    Breakfast
    Budget
    Budgeting
    Cake
    Candy
    Canning
    Carrots
    Cheese
    Chicken
    Children
    Chocolate
    Christmas
    Cleaning
    Coconut
    Comfrey
    Common Core
    Constitution
    Cookbook
    Cookies
    Cooking Oil
    Crafts
    Dairy Substitutions
    Dehydrating
    Dessert
    Dried Fruit
    Earth Oven
    Earthquake
    Easter
    Edible Weeds
    Eggs
    Emergency Prep
    Essential Oils
    Faith
    Family Home Evening
    Fertilizing
    Food Storage
    Fourth Of July
    Freezer
    Frosting
    Fudge
    Garden
    Gardening
    Gingerbread
    Gluten
    Gluten Free
    Gold
    Government
    Grains
    Gratitude
    Hat
    Herbs
    Home Remedies
    Home Repairs
    Homeschool
    Home Storage
    Honey
    Hope
    Inflation
    Leftovers
    Legumes
    Lemon
    Main Dishes
    Mixes
    Mothers
    Noah
    Non Artificial Colors
    Non-artificial Colors
    Nuts
    Oats
    Oil
    Orange
    Paint
    Peaches
    Pear
    Pie
    Pizza
    Plums
    Poem
    Popcorn
    Pork
    Potatoes
    Powdered Milk
    Prayer
    Preparedness
    Projects
    Prophecy
    Pruning
    Pumpkin
    Quick Bread
    Rhubarb
    Rice
    Salad
    Salt
    Sauces
    Self Reliance
    Self-reliance
    Sewing
    Shelf Life
    Shelves
    Sky
    Smoothie
    Snacks
    Soup
    Spices Or Seasonings
    Squash
    Strawberries
    Substitutions
    Sugar
    Summer Fun
    Three Month Supply
    Time
    Tomatoes
    Trees
    Truffles
    T-shirts
    Tuna
    Ultra Gel
    Valentine\'s Day
    Vegetables
    Water
    Watermelon
    Wheat
    Work
    Year Supply
    Zucchini

    RSS Feed

Web Hosting by iPage