The Provident Homemaker
  • Recipes and Info
    • Making Bread
  • My Blog
  • Favorite Resources
  • Documents and Files
  • 52 Weeks of Building Storage

Gingerbread House Pattern

12/8/2020

0 Comments

 
Picture
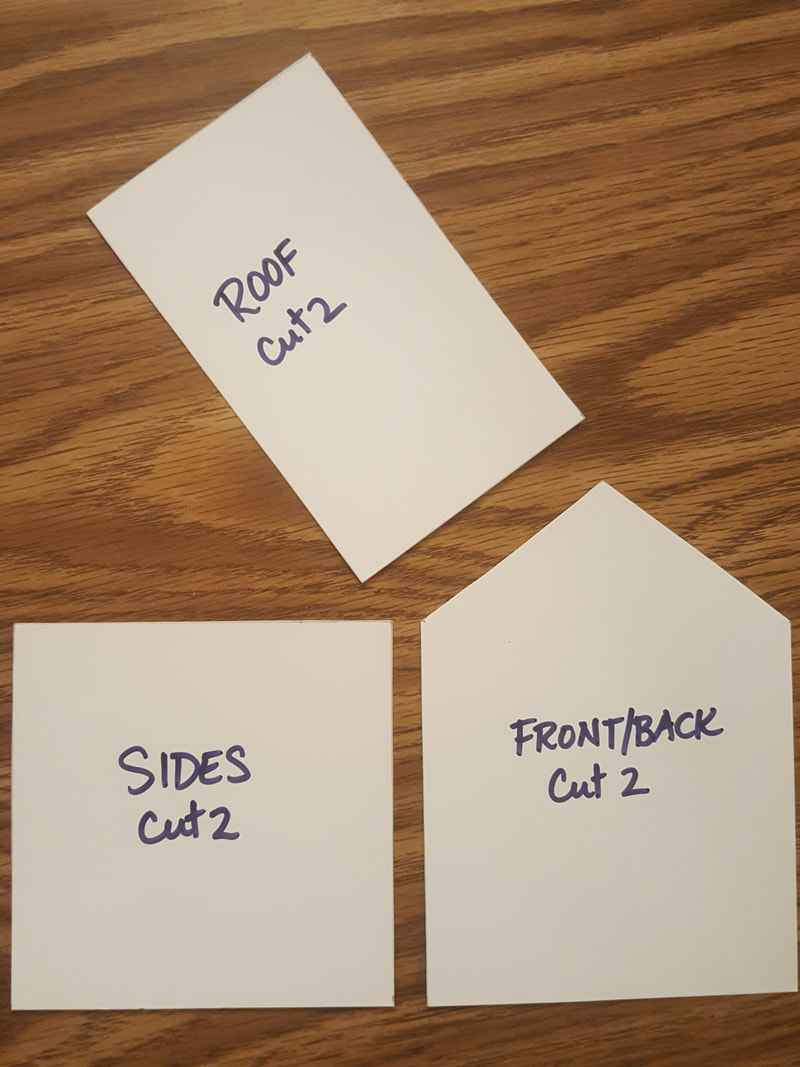
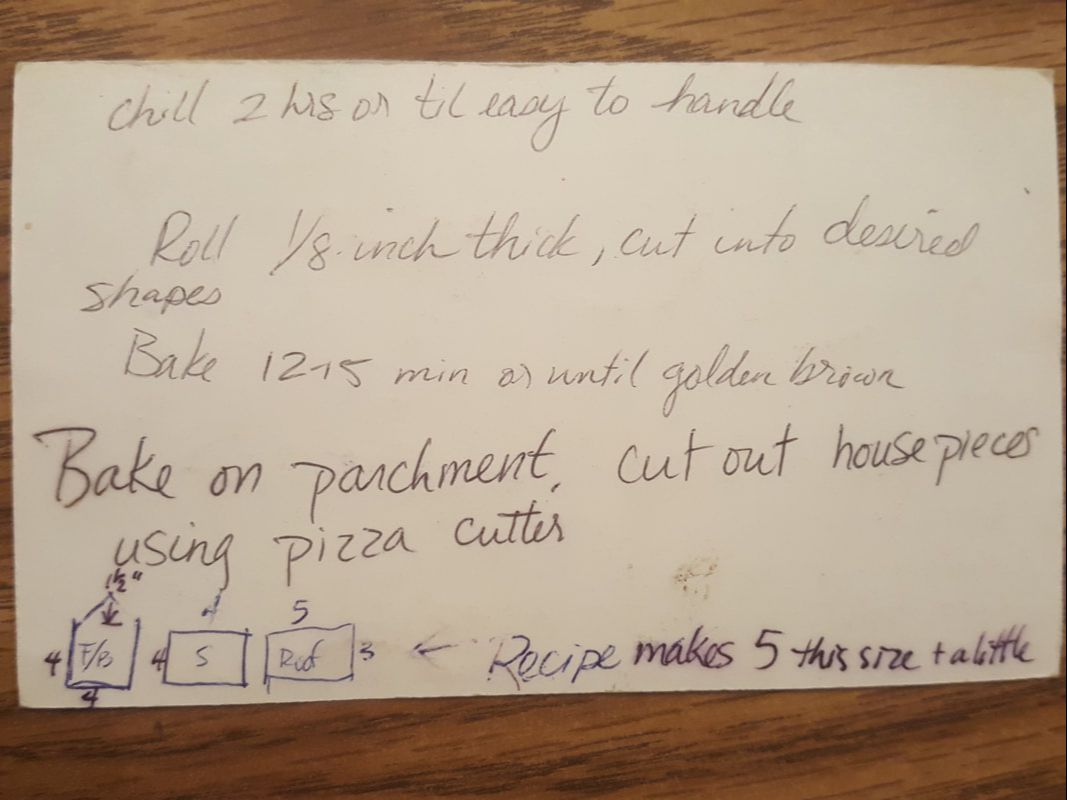
One of my children's very favorite traditions is decorating their own gingerbread house before Christmas. We put all of them up on the fireplace mantle, side by side, and (mostly) leave them alone until the end of the year.  Eating the houses is a fun treat for New Year's Eve. This is a pattern for the size of house each of them gets.  Before decorating, it stands just under 6" tall, 5" front-to-back, and about 4 1/2" side-to-side. You'll need to cut two pieces of gingerbread from each pattern piece, for one house. A single batch of my gingerbread dough will make 5 houses, with a little bit of dough left over if you rolled it to the right thickness. 

There are other gingerbread posts on this website -- one with my best gingerbread house recipe and baking tips --there's even a link to a gluten-free version-- and another with easy instructions for assembling the houses with the least amount of hassle possible, and then decorating-- but I've not posted my pattern before.  Mostly because I hadn't figured out a good way to do it. Hopefully this works-- sharing the dimensions via photo. I make the annual pattern using graph paper, a ruler, and a pencil. Sometimes I use that pattern to trace onto cardstock or a cover sheet, for a thicker one that can handle being used on more houses.  We baked about 30 houses one year, as a school class activity! With eight children, a daughter-in-law, and usually a couple of extra people joining us, we typically make about 12-13 houses at one go now.  The graph paper one should hold up fine for one or two batches of dough. The paper will get translucent pretty quickly from soaking up some of the butter in the dough-- but that doesn't hurt it. 

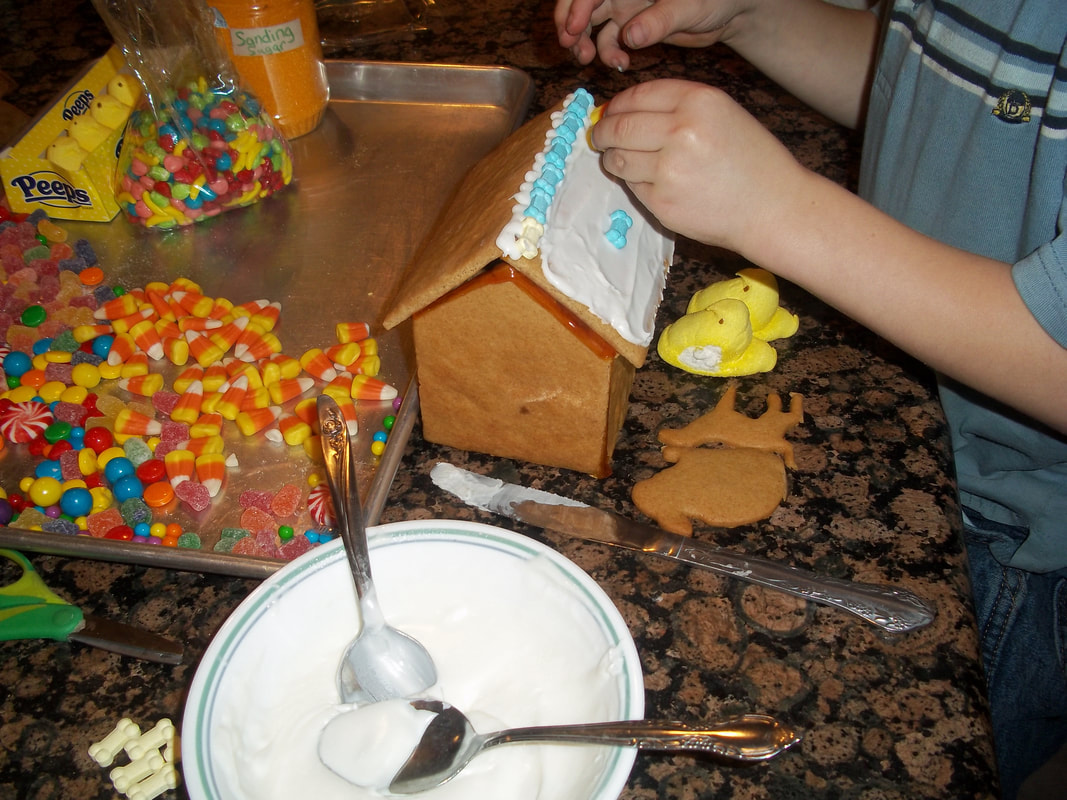
Below is a photo of the size house this pattern will make. 
​
Yes, most of our decorating candy comes from buying Easter and Halloween candy on clearance after the holiday!

Picture
If you want stiffer pattern pieces (below), trace around the graph paper pieces onto a piece of cardstock, a cover sheet, or thin rigid plastic (cleaned well). The plastic one could be washed and saved to reuse every year. 
Then the only trick is to remember where you stored it...

Picture

Picture

Picture
Picture
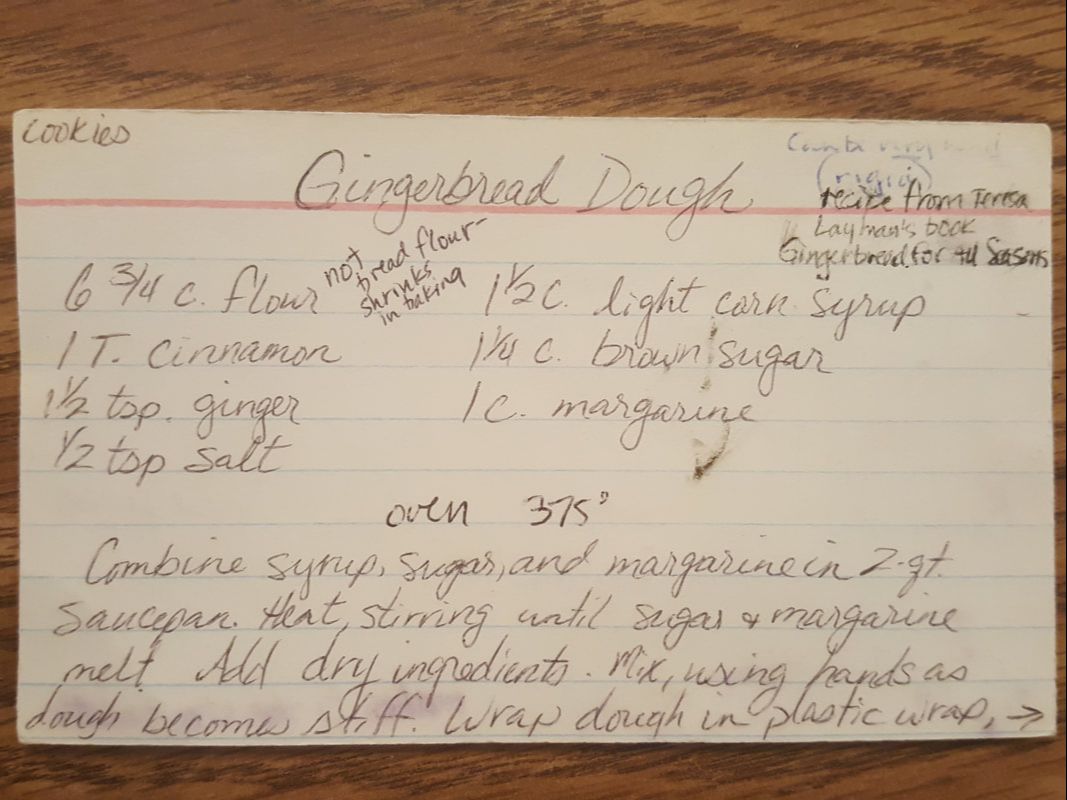
....and this is how I remember what size to make the pattern pieces each year.  It took about ten years to realize that adding a note on the back of the recipe card would be super helpful...
0 Comments

Week 37, and Candied Orange Peel

12/26/2019

0 Comments

 
Picture
To help with building your year's supply (this is Week 11 of 26), see this chart. 
 
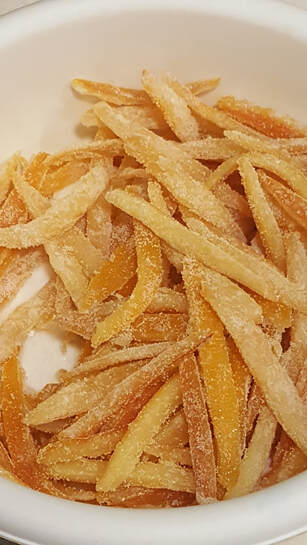
Candied orange peel takes some time, but it's really easy and requires very little hands-on time. It's done mostly while you’re working on other projects. Basically, you cut orange peel into strips, boil it in two changes of water to get the bitterness out, simmer for an hour in a basic sugar syrup, cool, then toss with sugar to coat. It’s delicious by itself, dipped in chocolate (my favorite!), or chopped up and used in recipes. It’s especially good in muffins, cookies, breakfast oatmeal,yeast breads, cakes, zucchini bread, etc. You get the picture.  Any citrus peel may be candied- grapefruit, lemon (yum!), lime. Clementines are even an option, but their peel s are so thin you’ll be candying uneven pieces, rather than neat strips.

I saw chopped candied orange peel at the store today.  The ingredients included high fructose corn syrup, sodium benzoate, sulfur dioxide.  When you make this yourself, it has two ingredients.  Two. (Water doesn't count.)


I made three batches this year with the peel from eight oranges each batch. This made about six pounds of candied orange peel total, which took between 3 and 4 pounds of chocolate to coat. (I tend to work in biggish quantities.)  Everybody who tried it loved it.  Everybody, that is, except my husband.  He’d rather eat the orange jelly sticks from the store.  I’m OK with that; I’d rather have these.
 
You can make any size batch—even down to the peels from a single orange—but other than the time to cut up the peels, it takes almost no more time to candy a lot than a little.
 
What can you do with the now-peeled oranges?  In a family my size, we have no problem eating them within a day or two. My kids especially like them sliced in wheels to eat with breakfast. But we often make my mom’s orange salad- separate the oranges into segments, cut them into bite-sized pieces, then combine in a bowl with canned pineapple and shredded coconut.  Quantities are super flexible, but a good amount is 4 -6 oranges to one 20-ounce can of pineapple (chunks or tidbits), along with ½ to 1 cup coconut.  Toss together and serve.
​

 
See the slide show below for pictures on making this.
Candied Orange Peel

8 oranges
Water
3 cups sugar, for candying
½ cup sugar, for coating
Chocolate for dipping- about 1 ½ pounds, optional

 
Peel the oranges as neatly as possible.  My favorite peeler by far is the one from Tupperware  –maybe that’s just because I grew up with it-- but this one will work, too.   
 
If you peel them like this (video) you’ll end up with four quarter-peels per orange.  Grab a pair of scissors and snip them lengthwise, with each one ¼- 3/8” wide.  Toss them in a large pan.
 
Cover with water and bring to a boil.  Turn down the heat and let the peels simmer for 10 minutes. Turn off the heat and let the peels sit anywhere from another ten minutes to overnight.  Drain the water. 

Cover the peels with new water. Repeat the boiling process, letting them sit afterwards for 10-30 minutes.  Drain as much of the water as you can.
 
To the peels in the pan, add 3 cups granulated sugar and 1 ½ cups water. Bring to a boil, then reduce to keep a stead boil.  Stir the peels occasionally.  Meanwhile, put a cooling rack on top of a cookie sheet to catch the drips later.

The goal here is to get as much of the syrup to absorb into the peels as possible. This usually takes about 60-70 minutes of cooking.  As you get closer to the end, the bubbles will change their look, becoming smaller and more white-looking.  Stir more often towards the end, so the peels don’t scorch. Once the syrup has been absorbed, use a slotted spoon to transfer the peels onto the waiting cooling rack.  Spread them out more or less evenly.   Let them cool for 30 minutes to 2 hours. (Nothing bad will happen if it’s longer; the worst is that less sugar will stick to them.)  Get the ½ cup of sugar. In a large bowl with a lid, dump half of it onto the bottom of the bowl.  Put all the orange peels in next, then add the other half of the sugar. Put the lid securely on the bowl, and shake to coat.  Stir if needed.  Leave the pan on the stove; we’ll get back to it.

Spread the orange peel out flat and one layer deep on two cooling racks or cookie sheets.  Once it’s dry to the touch—a few hours or overnight—it’s ready to dip in chocolate.

What do you do with the last of the syrup in the pan and what dripped off onto the cookie sheet when the hot peels drained? 
Scrape off whatever’s on the cookie sheet and add it to the pan. Add ¼ cup water to the pan, bring it to a boil, scraping the sides of the pan.    This syrup can be used on pancakes or oatmeal, or to flavor water, smoothies, or other drinks.  Refrigerate any leftover syrup.

Store not-dipped orange peel in a tightly-covered container at room temperature if it's only for a few days, or in the refrigerator for longer.  I've had it that way for months.  As long as it hasn't grown mold, it's still good.  It's likely to dry out a bit over time, but that's fine.  Store
chocolate-dipped orange peel in a tightly-covered container for a few weeks.  I really don't know the shelf life because it's always eaten within a week or two. 

0 Comments

Week 36- Two Minute Fudge - and Make Your Own Sweetened Condensed Milk

12/21/2019

0 Comments

 
Picture
To help with building your year's supply (this is Week 10 of 26), see this chart. 

Have you ever been to a store that sells fudge?  They display pan after pan of luscious flavors.  Well, now you can make them in mere minutes!  This recipe includes not only the basic semisweet chocolate fudge, but eighteen other flavors. 

Fudge can be made in advance, kept airtight in the refrigerator for a month, or wrapped well and frozen for 2-3 months. This recipe is super simple, and can be turned into lots of flavors.  My family’s favorites are Orange Crème Fudge and Cookies and Cremesicle Fudge. (Yes, that’s not the normal spelling, but ‘creamsicle’- regular spelling- is trademarked.)  My favorites include Caramel Swirl Fudge- in either vanilla or chocolate- Strawberry-Truffle-Layer Fudge. With pecans, please.

See here for more classic candy recipes-- toffee, penuche, truffles, fondant, and more base fudge recipes.
Picture
When making a batch of fudge, if it’s too firm or too soft, it can be fixed.

If it’s too soft, there are at least two approaches.

1- you can refrigerate or freeze it and serve it cold.  Once it’s chilled, you can eat it plain in the traditional squares, or scoop into tablespoon-sized balls.  Roll in powdered sugar or unsweetened cocoa powder, and serve as truffles.
2- make it even softer and turn it into hot fudge sauce. To do this, scrape the fudge into a microwave-safe bowl, add ¼ cup milk, cream, or evaporated milk, and heat for a minute or two, until you can stir it.  Stir until smooth.  If it’s still too thick for sauce, add more milk or cream.
 
If the fudge is too firm, scrape the fudge into a microwave-safe bowl, add 1-2 Tbsp. milk, cream, or evaporated milk, and heat for a minute or two, until you can stir it.  Stir until smooth.  Pour into a newly buttered pan.
 
If you want a healthier version of fudge, try Clean Eating Fudge. It’s Paleo! -and even works for those who can’t have dairy.


The fudge below can be made with a regular can of sweetened condensed milk, a homemade version, or even with a homemade dairy-free version. If you don't have any of those 3 options available, you can boil 7 ounces of cream, evaporated milk or (naturally dairy-free) coconut cream with 1 cup of sugar. Stir to dissolve the sugar, and you have a great substitute for sweetened condensed milk.

Two-Minute Fudge* 

3 cups semisweet chocolate chips (1 ½ 12-oz bags)
1 (14 oz.) can sweetened condensed milk (make your own here)
1 tsp. vanilla, optional
pinch of salt, optional
1 c. toasted and chopped nuts, optional
 
*Approximately two minutes of cooking time. 
 
Line an 8x8 pan with aluminum foil, waxed paper, or plastic wrap.  Spray with nonstick spray, or butter it. Set aside.
Stir together chips and milk.  Heat in microwave for one minute. Stop and stir. Repeat until the mixture is melted, stirring every minute. Stir in vanilla and salt.
 
Pour into lined and buttered 8x8 pan. Chill until firm- this will take about 2 hours in the refrigerator or 20 minutes in the freezer.
 
Makes 2 lbs. without the nuts.
 
To cut the recipe in half, 7 oz. of sweetened condensed milk is just over 1 ¼ cups.
 

Milk Chocolate Fudge
Increase chocolate to 4 cups (2 12-oz. bags). Makes almost 2 ½ lbs. without nuts.

Peanut Butter or Butterscotch Fudge
Use 4 c. peanut butter chips or butterscotch chips.

Vanilla Fudge
Use white chocolate chips, increasing to 4 cups.

Cherry Vanilla Fudge
Stir in 1 c. quartered candied cherries, replace half the vanilla with
almond extract, use almonds for the nuts.


Cookies and Creme Fudge
Break each of 16 chocolate sandwich cookies into fourths; stir into Vanilla Fudge. (see below)

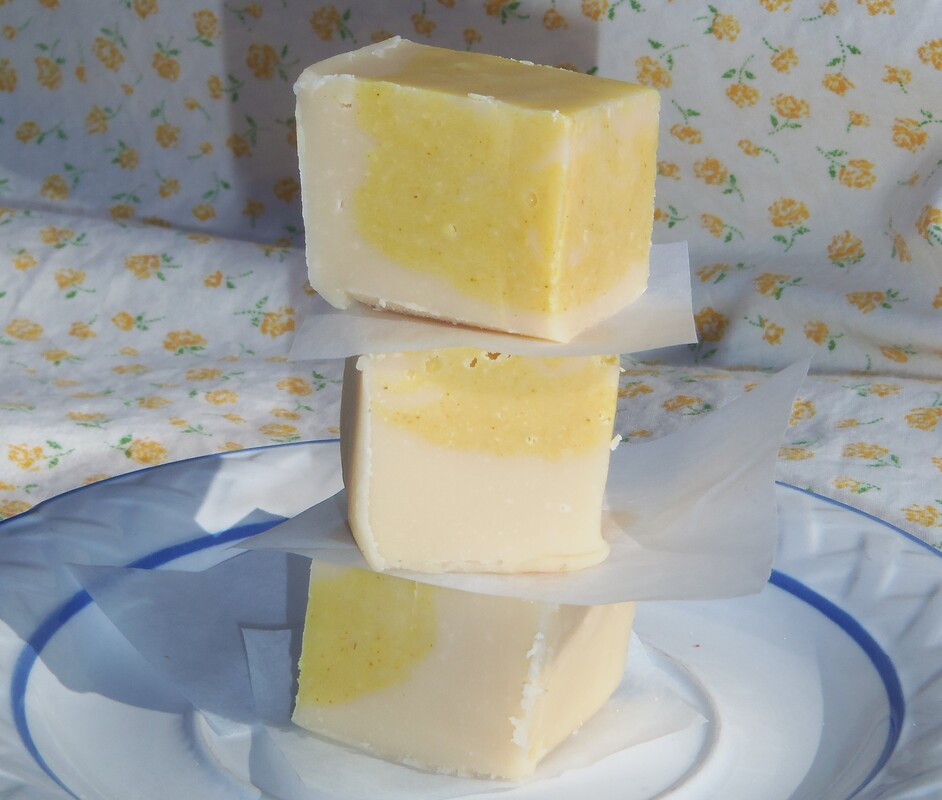
Cremesicle Fudge (Orange Creme Fudge)
Make a batch of vanilla fudge, pour 3/4 of it into prepared pan. To remaining fudge, add 3 drops yellow food color, 2 drops red, and 1 tsp. orange extract.
Drop by spoonfuls onto top, swirl in.


Caramel Swirl Fudge
Melt 4 oz (about 18 squares) of caramel with 1-2 tsp. of water, drop by spoonfuls onto top, then swirl.

Candy Bar Fudge
Melt 4 oz caramel with 1-2 tsp. water, stir in 3/4 c. peanuts. Drop on top and either swirl in or cover the top with 1 c. chocolate chips, melted.

Chocolate-Peanut Butter Fudge
Add 2 Tbsp. peanut butter to hot mixture, before powdered sugar is added. Top with chopped peanuts if you like, pressing them in slightly.

Mint Layer Fudge
Make chocolate fudge; spread in pan. Melt together 1 c. white chips, 2 Tbsp. milk, 1/4-1/2 tsp. mint extract, and 1/8 tsp. green food color. Mix well, spread on top.

Orange-Pecan Fudge
Make vanilla fudge, stir in 1 Tbsp. orange zest, finely chopped, and 1 c. pecans.

Peanut Butter Swirl Fudge
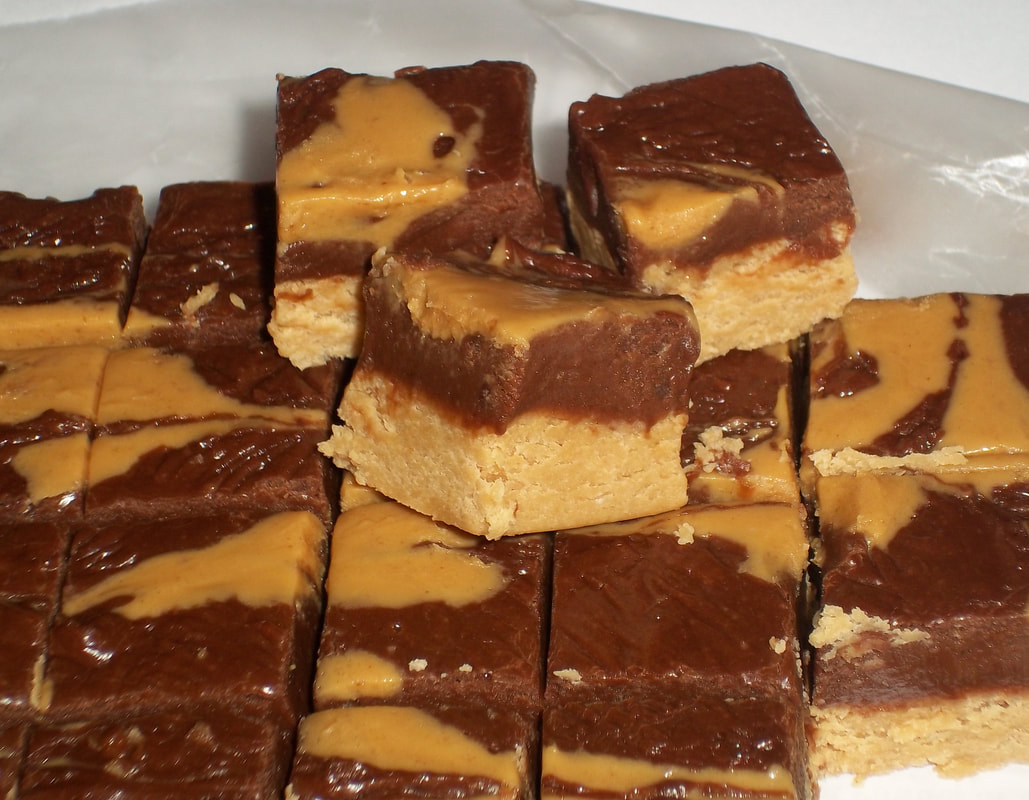
Make chocolate fudge, melt ½ c. peanut butter, drop on top of fudge; swirl.

Rocky Road Fudge
Use nuts, and stir 2 c. mini marshmallows into fudge before spreading into the pan.

S’mores Fudge
Leave out nuts, stir in 1 c. mini marshmallows and 4 whole grahams, broken.

Strawberry Fudge
Replace half the condensed milk with 1 1/4 c. strawberry jam. Swirl about 2
Tbsp. jam on top. Especially good with pecans or walnuts.


Strawberry ‘Truffle Layer’ Fudge
Spread regular fudge in pan, melt together 1 c. (6 oz.)semisweet chips with 2 Tbsp. butter. Stir in 1/4 c. strawberry jam. Spread on top.

Toasted Coconut Fudge
For either chocolate or white fudge, toast 1 c. coconut, stir in 3/4 c, along with 1 c. chopped toasted pecans. Sprinkle remaining 1/4 c. coconut on top, press in. If using a fudge recipe that calls for milk or evaporated milk, you may also substitute an equal amount of coconut milk.

Wonka Bar Fudge
substitute 4 whole graham crackers, broken into small chunks, for the nuts.


Picture
Cremesicle Fudge.  
0 Comments

Trust and direction

12/26/2013

0 Comments

 
We're in the transition between the celebration of Christmas and the reevaluation of a new year; here's some of what I've been thinking about.
Picture
We just don't know all the long-term effects of our actions... but he does; he who knows the end from the beginning.  He tells us,  My name is Jehovah, and I know the end from the beginning; therefore my hand shall be over thee, and "I am God, and there is none like me, 10 Declaring the end from the beginning, and from ancient times the things that are not yet done" (Isaiah 46:9-10).

I know that God has directed my paths, that I benefit most from this when I pay attention and listen for his counsel and direction.  I'm grateful for the struggles and learning he's helped me through; they prepare me to become more like he is, and to better serve him and his children.

0 Comments

Suzy Snowflake costume

12/14/2013

0 Comments

 
Picture
Did you ever learn the song that starts, "Here comes Suzy Snowflake"? Our family was asked to come up with a musical number for a party... and that's what we chose.  And my girls got some great dress-up skirts out of it.  (I told them they're early Christmas presents... and now that we've performed, the skirts get wrapped and put under the tree.)
Picture
On the Youtube video below, she shows you a quick way to cut strips of netting: roll the tulle without creating wrinkles; cut the roll into 3” strips.  She used 4 colors, 1 yd each, for a 2-4-year-old’s skirt.  For that shorter skirt, she cuts each strip in half.  She says it takes about 45 minutes to make one; we spent about an hour apiece but that was with my 11-year-old doing most of the tying.
I  used her method but made longer skirts- the biggest of the two was 27" long, the small one was 24" long. So I made the strips 54" long for the first, 48" long for the second. When I got to the fabric store, I found that the more delicate-looking Illusion netting, 108" wide! so I could get twice as many strips per yard- was on sale for $1/yd, so I got that instead of the coarser netting.  I used almost 5 yard for the bigger skirt and about 4 1/2 yards for the smaller one. For the larger snowflake overlay skirt (18" long), I bought turquoise sparkle tulle, folded it in sixths cut a circle with a 22" radius (needed 1 ¼ yds); cut out a circle for the center, and cut it like a very simple snowflake.  The smaller overlay (14" long) only required 1 yard.    By the way, there's a great website that allows you to create snowflakes online and see what they'll look like before having to cut any actual paper.

The snowflake crowns were cut from the bottom of a plastic gallon-sized milk jug, then my girls colored the snowflakes blue.  See the slideshow for photos of that.
0 Comments

'Clean Eating' Paleo Fudge

12/10/2013

1 Comment

 
Picture
Are you trying to eat healthier but really, really crave fudge?  This one uses healthy fats and honey.   It's also dairy-free and gluten-free for those who need to avoid those.  

Avocados are high in three amazing fats: both phytosterols and PFAs (polyhydroxylated fatty alcohols) are documented to be anti-inflammatory, and oleic acid, which helps our digestive tract absorb fat-soluble nutrients.  Coconut oil is healthy for many reasons, including being anti-inflammatory and having a high lauric acid  and medium-chain fatty acids content.  
But enough about that.

The big question is, doesn't avocado totally mess up the flavor here?

No.  I have a pretty discriminating set of tastebuds, and the only way I can detect the avocado is by a faint fruity flavor.  Because of that, some of my favorite variations of this fudge include fruit:  orange zest or oil, chopped dried cherries (and toasted almonds!), and the like.  This fudge is really only a slightly thicker version of my ChocolateTruffle Pie.

The recipe below includes both orange and pecans; if you don't want them, just omit the pecans and orange zest or orange oil.

You can also use this recipe to make truffles; cut into squares, then quickly roll each square into a ball; roll in cocoa powder or chopped nuts to coat.

Orange-Pecan Fudge            makes about 3/4 of a pound 

1 ripe avocado, peel and pit removed
1/4 c. coconut oil
1/4 c. honey
1/4 c. unsweetened cocoa powder
2 Tbsp. water
zest from half of an orange (about 1/2 Tbsp.), or 2 drops orange essential oil
3/4 tsp. vanilla
pinch of salt (1/16 tsp.)
1/4 c. toasted chopped pecans

Line a 5 1/2 x 3 loaf pan (or 2-cup rectangular or square container) with foil; spray with nonstick cooking spray.   Set aside.
Put the water, zest (should be about 1 Tbsp), honey, coconut oil, cocoa, avocado, vanilla, and salt in a blender or food processor.  Run on high for 1-2 minutes, until smooth.  Pour into prepared pan.  Cover and refrigerate 2-3 hours until set.   

Store in the refrigerator or freezer.  If freezing this, let pieces thaw about 10 minutes before serving.  I don't know how long it will keep in the fridge because it gets eaten so quickly.   But the one piece that survived us for a week and a half was still good.  Any longer than a week, though, it'd be better preserved in the freezer.  Wrap tightly.

1 Comment

Free Perpetual Christmas Calendar

12/5/2013

0 Comments

 
Picture
photo credit: Alex Grichenko
This December, would you like a daily thought, song, scripture, story, and/or activity to help you feel more of the calm spirit of Christmas?  My friend Amy over at LDS Holistic Living has a Christmas Advent Calendar you can use or download for free.  It's designed specifically with members of the LDS faith in mind, but anyone can find great things in it.  If you're interested, you can get the calendar here.

Meanwhile, here's a sample:

The Real Story Behind the 12 Days of Christmas


Catholics in England were prohibited by law from practicing their faith, both in private and in public from 1558 to 1829. Being a Catholic was treated as a crime. There was no restored gospel at the time, however there were good Christians who knew without doubt the true church was not one that was mainly created merely for the convenience of King Henry the Eighth who wanted to sin and have a church justify his actions. So in secret they continued to teach their children their  religion. 

"The Twelve Days of Christmas" was written in England during this time frame. It was written to help children learn about their religion. The entire song is writing in symbolism and hidden meanings because it was illegal to have anything in writing that would indicate adherence to the Catholic faith. To be caught could mean imprisonment, hanging, or drawn and quartered.
Christmas referred to a twelve day period that starts with Christmas day. "The Twelve Days of Christmas" referred to a twelve day period that began Christmas day. While the world may have celebrated Christmas for about twelve hours, these Christians celebrated it for twelve days as a reminder that the gifts of God are with us for twelve months of the year. It also represented the idea that we should be thankful for the gifts of God and follow His teachings for all twelve months of the year and not just one day a year. 

The song begins, "On the first day of Christmas my true love gave to me..." The "true love" represents God, as our greatest love should be for Him. The word worship means that which we love the most. The "me" who receives these presents is the Christian man or woman.

1. The "partridge in a pear tree" was Jesus Christ who died on a structure made from the wood of a tree. In ancient times a partridge was often used as mythological symbol of a divine, sacred king.

2. The "two turtle doves" were the Old and New Testaments - another gift from God. Doves symbolize peace and the Gospel contained in these scriptures, when practiced, brings peace.

3. The "three French hens" were faith, hope and love - the three gifts of the Spirit that abide (I
Corinthians 13). The French hens can also represent God the Father, His Son Jesus Christ and the Holy Ghost.

4. The "four calling birds" were the four Gospels which sing the song of salvation through Jesus Christ.

5. The "five golden rings" were the first five books of the Bible also called the "Books of Moses."

6. The "six geese a-laying" were the six days of creation.

7. The "seven swans a swimming" were "seven gifts of the Holy Spirit." (I Corinthians 12:8-11, Romans 12, Ephesians 4, 1 Peter 4:10-11)

8. The "eight maids a milking" were the eight beatitudes.

9. The "nine ladies dancing" were nine fruits of the Holy Spirit.
But the fruit of the Spirit is love, joy, peace, longsuffering, gentleness, goodness, faith, meekness, temperance: against such there is no law." (Galatians 5:22)

10. The "ten lords a-leaping" were the Ten Commandments.

11. The "eleven pipers piping" were the eleven faithful disciples.

12. The "twelve drummers drumming" were the twelve points of the Apostles' Creed.
0 Comments

Neighbor Gifts, Gingerbread Syrup and Cherry-Almond Fudge

12/21/2012

0 Comments

 
Picture
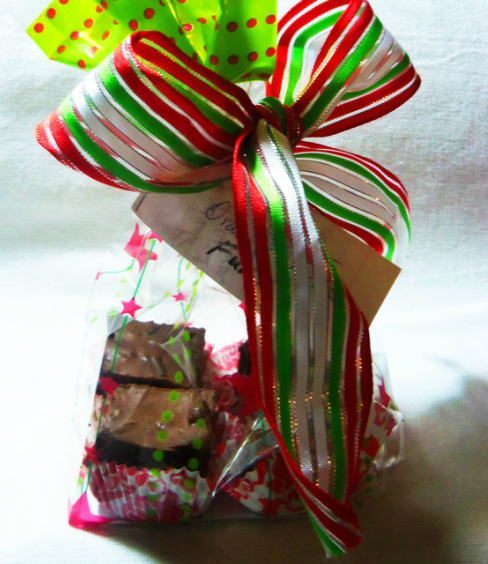
Do you want something simple to give to friends and neighbors?  Here are some quickies; if you have more time you might like Candy Cane Bread, shaped and decorated like a candy cane.  
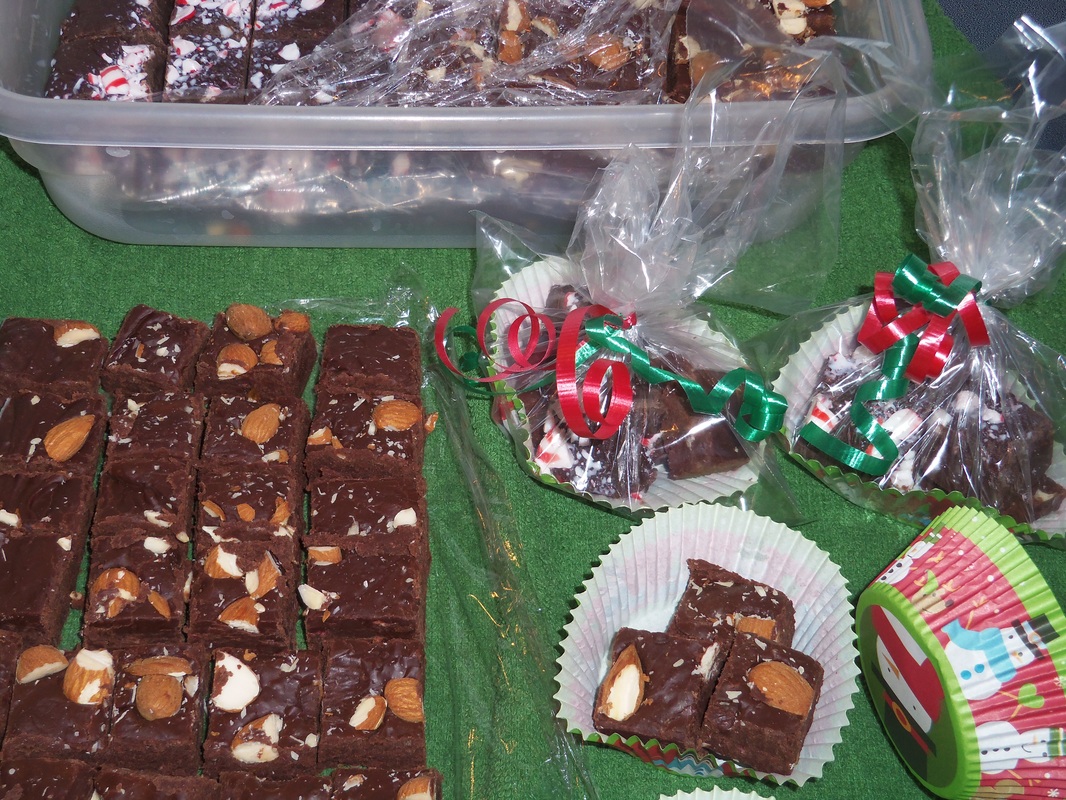
Recipes for the fudge and the gingerbread syrup are below.

For the jars to pour syrup in, I save jars through the year: spaghetti sauce jars, pickle jars, jelly jars,baby food jars, peanut butter containers (don't use those for anyone with peanut allergies!)...
After Christmas, anything that didn't get used gets put in the recycle bin, and I have cupboard space once again!
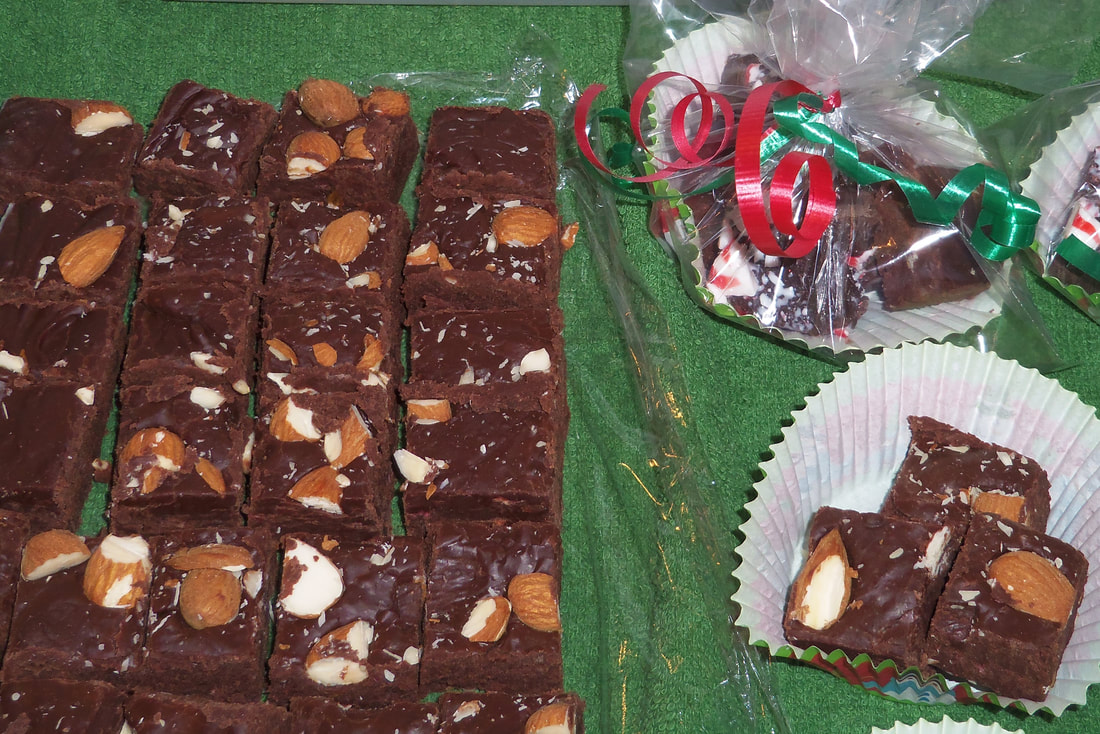
Cherry-Almond Fudge

2 c. sugar
1/2 c. milk
7 oz. marshmallow creme (may use 7 oz. marshmallows instead)
12 oz. semisweet chocolate chips
1 tsp. almond extract
1 tsp. cherry flavor  (I used wild cherry, and it was amazing!)
1/4 c. dried cherries or cranberries, finely chopped
1/2 c. almonds, chopped

Line an 8x8 pan with parchment or foil; butter well if using foil.  Set aside.  Combine the sugar and milk in a medium saucepan.  Bring to a boil, stirring often, then boil for 3 minutes.  Pull off the heat, then add marshmallow creme, chocolate chips, almond and cherry extracts, and dried cherries.  Stir until smooth.  Pour into prepared pan, and sprinkle with chopped nuts.  
Refrigerate 1 hour or until firm, then cut into squares.  Store airtight at room temperature.

Makes just over 2 pounds.


Gingerbread Syrup 
(notice this recipe is basically the same as above, only without the marshmallow, and with extra milk to make it pourable)  If you don't have cinnamon chips, use white chocolate chips or butterscotch chips, then add 1-2 Tbsp. ground cinnamon, to taste.


2 c. sugar (can use brown sugar for deeper flavor, or add 1 Tbsp. molasses)
1 c. plus 2 Tbsp. milk
12 oz. cinnamon chips (I used Hershey's brand)
1 tsp. ground ginger OR 1 drop ginger essential oil
1/2 tsp. ground cloves OR 1 toothpick of clove oil
1/8 tsp. salt
1/2 c. pecans, toasted and finely chopped

In a medium saucepan, bring the sugar and milk to a boil, stirring occasionally.  Boil for 1 minute, then remove from heat.  Stir in cinnamon chips, ginger, cloves, salt, and stir until smooth.  Stir in pecans, then pour syrup into jars.  Store in the refrigerator.  Warm before serving.  (If too thick, microwave briefly.)

Makes about 3 1/2 cups.


0 Comments

Joy to the World

12/7/2012

0 Comments

 
Tonight I stood in the kitchen with my 10-year-old daughter; I kneaded bread rhythmically on the counter while she prepared pumpkin for the first time, scooping out seeds, cutting carefully into cubes to be steamed.  We had music playing in the corner, Handel's masterpiece "Messiah" emanating from a  pink Barbie CD player.   Nevermind that my daughter was in charge of the pumpkin because she'd poked holes in it with a pencil (a smiley face, but now it wouldn't store through the winter) or that it was 11pm and both of us would have liked to been asleep.  Some days the schedule just goes out the window.  But as I showed her what to do - and not do!- then watched while she eagerly and carefully cut the pumpkin- I had the feeling I think every mother gets every now and again.  The feeling that this  is what life is about.  Joy in learning.  Joy in being with family.  Joy in seeing abilities and confidence bloom in someone you love.  Joy in working together, in passing skills on to the next generation, and in helping them see the results of honest effort.  Joy in beautiful music and gratitude for those who created such uplifting works.  Joy in my Savior, his life and example.    
Joy to the world!  -for all these joys are available to everyone to some degree.
If you'd like to hear the whole Messiah- which is the best way to hear and understand its message- here you go.
Notice the music above is over two hours long... it's the entire work.  Handel wrote this in only 24 days- hundreds of pages of music for choir and instruments. It was written to help the listeners understand more about Jesus Christ, the Messiah.  The lyrics are taken directly from the Old and New Testament, and go through His life, from before his birth, clear through his sufferings, Atonement, resurrection, and glory.  A good, short video giving some of the background can be found here, or see a fantastic blog post here.  I love to feel the power of the music and the message.    At one point while this music was being composed, a friend came to visit and found Handel sobbing with emotion after writing the Hallelujah chorus. Handel is quoted as saying "I did think I did see all heaven before me and the great God himself."   It is customary to stand while that chorus is sung... but did you know the chorus is referring to Christ's Second Coming?  The scriptures this chorus comes from are Revelations 19:6, 16, and 11:15.  It, like the "Christmas" song Joy To the World (which Handel wrote the music for), are really a celebration of the future day when Christ rules as the righteous King of kings. (You can read more about the background of the custom of standing here.)
  He signed the work "S.D.G":  Soli Deo gloria, or "glory to God alone".

Most people claim the best-known bit, the "Hallelujah Chorus", as their favorite, but the two below are my favorites.
0 Comments

Beating the Christmas Gimmies

12/24/2011

0 Comments

 
Picture
Isn't this what you hope for? 
A smile, a gift willingly given, and gratitude when it's opened.

We found that our children too often got the "gimmies" (Gimmie, gimmie, gimmie...)--
Tear one present open, toss it behind them, and reach to see what's next.  Some presents never got played with or appreciated, relegated to the side of the room forever, in favor of something more exciting.  To help eliminate that, we started a Christmas tradition a few years ago.   

There's no rule on when they're allowed to get up- but present-opening won't start until 8 a.m.  Stockings, and only stockings,  are free game before that.  Each of the kids gets a box of cereal as part of their stocking (set to the side, no, they don't fit inside!), so that pretty much takes care of breakfast.  (If you'd like fresh cinnamon rolls, see the Refrigerator Rolls post.)  Right before opening presents, we read the Christmas story in Luke Chapter 2, and have our usual family song and prayer for the day.
We take turns opening one present each hour, on the hour- only one package opened at a time, going from youngest to oldest, each person choosing what to open.  We also open 1-2 family gifts, depending on how many are under the tree.  We spend the next hour looking at, playing with, or reading whatever our gift was, or the kids play together with something.  We meet under the Christmas tree an hour later, to do this again. 


This has really helped our children notice and appreciate each gift better. 


Since we have a large family, all the kids buy or make small gifts for each other, and grandparents give gifts, everyone actually has about ten presents.  Rather than taking ten hours to open, though, we open the rest of them at about hour #5.  

I recently read someone's else's method; they have each person gather the gifts they are GIVING, and distribute those themselves.  The point of this is to focus on the giving, more than the receiving.  This year we'll combine the two ideas, letting one person each hour give out all their gifts.  (After-Christmas- update:  I LOVED doing this, and the kids were really excited to give their gifts out in one round .  Next year I'll let the teenagers give last, though, so they  end on a grateful/happy note.  I made the mistake of having them ) 

And this year, with Christmas on Sunday, our kids voted to have just the filled stockings for Christmas morning, and "Christmas" on Monday.  They want this because there are household rules on the types of play on the Sabbath (i.e., no bike riding, rollerblading, or trampoline jumping!), and they figure they can FULLY enjoy whatever they're getting if there are fewer limitations.  I'm voting for this because then we can hopefully focus more on Christ that day, including watching the video links, below.

May you have a Merry Christmas, filled with happiness, peace, appreciation, and love for your family and our Savior.

 
Picture
For some beautiful, newly-released Bible videos on the original Christmas, from The Annunciation to The Wise Men and in between, see here.

0 Comments

Making Gingerbread Houses, part 1- Baking

11/17/2011

0 Comments

 
Picture
It's that time of year...

to make gingerbread houses!  Whether you want to make one for a competition, or just make something fun with your children, here's my family's tried-and-tested favorite recipe for eating AND building. (See here for a gluten-free recipe, or just substitute a GF flour blend in place of regular flour.)  We have a yearly tradition of everyone in the family decorating a small house.  If you want a recipe that will bake up thin yet strong, suitable for competition-level houses, the next couple pictures are of this one.  The eating/building recipe has more leavening and therefore a lighter crunch.  The 'building' recipe, below, is also good, but more dense.  Be sure to roll this one thinly!!!

The pattern I use most often for my family is here. 

See here for Part 2- Assembling and Decorating

Picture
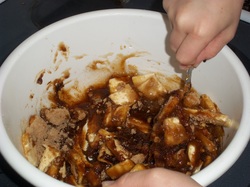
For the full recipe, along with more instructions, tips, and things I've learned, it's also on the link above.  Put in a large bowl or medium saucepan: 1 1/2 c. light corn syrup, 1 1/4 c. brown sugar, and 1 cup butter.  This will be easiest if you cut each cube of butter into 5-6 chunks.

Picture
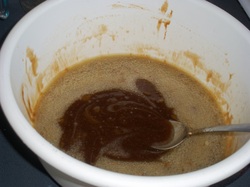
Heat in the microwave about a minute or until everything melts and can be stirred together.  If using a saucepan, heat over medium-high, stirring until the sugar and butter melt.

Picture
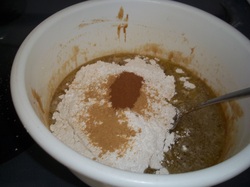
Add the dry ingredients to the bowl:
6 3/4 c. flour, 1 Tbsp. cinnamon, 1 1/2 tsp. ginger, 1/2 tsp. salt.

I like to grab the dry stuff with my fingers and mix lightly before mixing it with the wet, this saves the step of pre-stirring all the dry ingredients in a separate bowl first.  

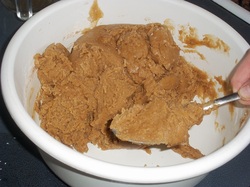
Stir until everything is mixed well.

Picture
This dough will be warm and firm yet soft; it gets stiffer as it cools.  It's easiest to roll out while still warm. 
If it gets too stiff, return to the microwave for 30 seconds to rewarm it. 
   

Picture
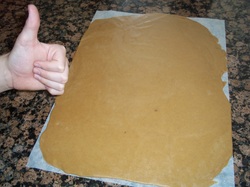
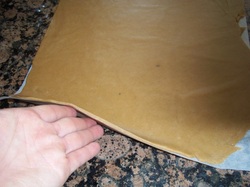
Divide dough into 2 or three pieces.  Working with one a time, roll  directly onto parchment, if at all possible.  This will save you immeasurable aggravation! 

Picture
Try to get it an even 1/8" thick.  As you can see, this is quite thin.  The corn syrup gives this dough a lot of strength.

Picture
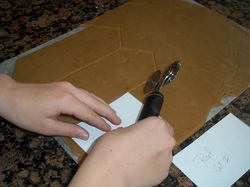
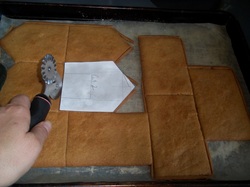
Put your pattern on top of the dough, and cut around each piece.  Try to have each piece touching as much as possible.  The easiest way to cut them, by far, is to use a pizza cutter or pastry wheel.

Picture
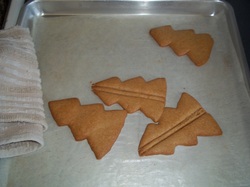
Bake until golden brown and firm to the touch.  Pull out of the oven, and IMMEDIATELY re-cut the pieces, if you need them to be exact.  They will have spread a little bit.  If you're making eight houses for your family, you can skip this step! 

Picture
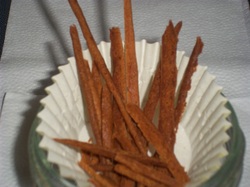
My favorite part of baking gingerbread houses: eating the 'twigs', the skinny little pieces trimmed off the house parts.  They are addictive!    

Picture
To make stand-up trees, cut out two for each tree.  Cut a section out of the middle of one of the pieces, as wide as your dough is thick.  You'll 'glue' one  of these halves on the front of the whole tree, the other half on the back.        

Picture
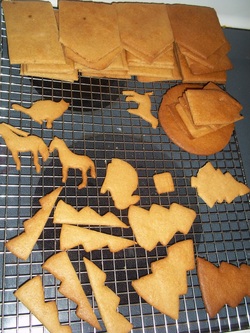
Cool on a cooling rack.  When all the way cool, I like to stack all the pieces for one house in each stack.  Here are five houses -- what one batch of dough made-- ready to put together.

Next is the really fun part- decorating!  That is another post.
Picture
It's the little details that make gingerbread so fun!

0 Comments

    Need a Search bar?
    One day I may upgrade my website-- but until then, use your web browser search bar. Type in my web address and what you're looking for, like this-- 
    www.theprovidenthomemaker.com  pumpkin --  and you should get results.


    Author

    I'm a disciple of Christ, a member of the Church of Jesus Christ of Latter-day Saints, a family-defending, homemaking, and homeschooling mom of eight children, two of whom sometimes can't have milk or wheat. Growing up on a farm in a high mountain valley, my parents taught me to 'make do', work hard, smile, and help others.  I love cooking, learning, growing food and flowers, picking tomatoes, and making gingerbread houses --which CAN be made allergy-friendly-- with my children.  I hope you find something to help you on my site!

    Archives

    April 2024
    July 2023
    April 2022
    September 2021
    March 2021
    December 2020
    April 2020
    March 2020
    February 2020
    January 2020
    December 2019
    November 2019
    October 2019
    September 2019
    August 2019
    July 2019
    June 2019
    May 2019
    April 2019
    January 2016
    November 2015
    October 2015
    September 2015
    March 2015
    February 2015
    November 2014
    October 2014
    September 2014
    August 2014
    July 2014
    June 2014
    May 2014
    April 2014
    March 2014
    February 2014
    January 2014
    December 2013
    November 2013
    October 2013
    September 2013
    August 2013
    July 2013
    June 2013
    May 2013
    April 2013
    March 2013
    February 2013
    January 2013
    December 2012
    November 2012
    October 2012
    September 2012
    August 2012
    July 2012
    June 2012
    May 2012
    April 2012
    March 2012
    February 2012
    January 2012
    December 2011
    November 2011
    October 2011
    September 2011
    August 2011
    July 2011
    June 2011
    May 2011
    April 2011
    March 2011
    February 2011
    January 2011
    December 2010
    November 2010
    October 2010
    September 2010

    Categories

    All
    Alcohol
    Alternate Cooking
    Appearances
    Apple
    Apricots
    April Fools
    Aprons
    Bananas
    Beans
    Beef
    Beets
    Bench
    Beverages
    Bonnet
    Bread
    Breakfast
    Budget
    Budgeting
    Cake
    Candy
    Canning
    Carrots
    Cheese
    Chicken
    Children
    Chocolate
    Christmas
    Cleaning
    Coconut
    Comfrey
    Common Core
    Constitution
    Cookbook
    Cookies
    Cooking Oil
    Crafts
    Dairy Substitutions
    Dehydrating
    Dessert
    Dried Fruit
    Earth Oven
    Earthquake
    Easter
    Edible Weeds
    Eggs
    Emergency Prep
    Essential Oils
    Faith
    Family Home Evening
    Fertilizing
    Food Storage
    Fourth Of July
    Freezer
    Frosting
    Fudge
    Garden
    Gardening
    Gingerbread
    Gluten
    Gluten Free
    Gold
    Government
    Grains
    Gratitude
    Hat
    Herbs
    Home Remedies
    Home Repairs
    Homeschool
    Home Storage
    Honey
    Hope
    Inflation
    Leftovers
    Legumes
    Lemon
    Main Dishes
    Mixes
    Mothers
    Noah
    Non Artificial Colors
    Non-artificial Colors
    Nuts
    Oats
    Oil
    Orange
    Paint
    Peaches
    Pear
    Pie
    Pizza
    Plums
    Poem
    Popcorn
    Pork
    Potatoes
    Powdered Milk
    Prayer
    Preparedness
    Projects
    Prophecy
    Pruning
    Pumpkin
    Quick Bread
    Rhubarb
    Rice
    Salad
    Salt
    Sauces
    Self Reliance
    Self-reliance
    Sewing
    Shelf Life
    Shelves
    Sky
    Smoothie
    Snacks
    Soup
    Spices Or Seasonings
    Squash
    Strawberries
    Substitutions
    Sugar
    Summer Fun
    Three Month Supply
    Time
    Tomatoes
    Trees
    Truffles
    T-shirts
    Tuna
    Ultra Gel
    Valentine\'s Day
    Vegetables
    Water
    Watermelon
    Wheat
    Work
    Year Supply
    Zucchini

    RSS Feed

Web Hosting by iPage